
Compare Dates allows you to compare a single Jira work item at two different points in time and clearly see how its field values have changed.
This feature is especially useful when you want to understand:
-
How an issue looked in the past?
-
What exactly changed between two dates?
-
Which fields were affected during that time period?
Instead of manually browsing the issue history, Compare Dates report presents a side-by-side comparison of field values for the selected dates.
Accessing Compare Dates
Compare Dates can be accessed in two different ways, depending on how you want to start your analysis.
Both access points lead to the same report, but the initial context may differ.
-
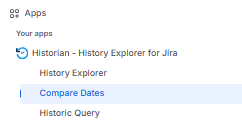
You can open it directly from the Apps → Historian – History Explorer → Compare Dates menu, which starts the report with an empty state where you manually select the work item, fields, and comparison dates.
-
Alternatively, you can open Compare Dates from the modal on the main History Explorer screen. In this case, the report opens prefilled with the work item and timestamp selected in the modal, allowing you to continue your analysis immediately without reselecting values.
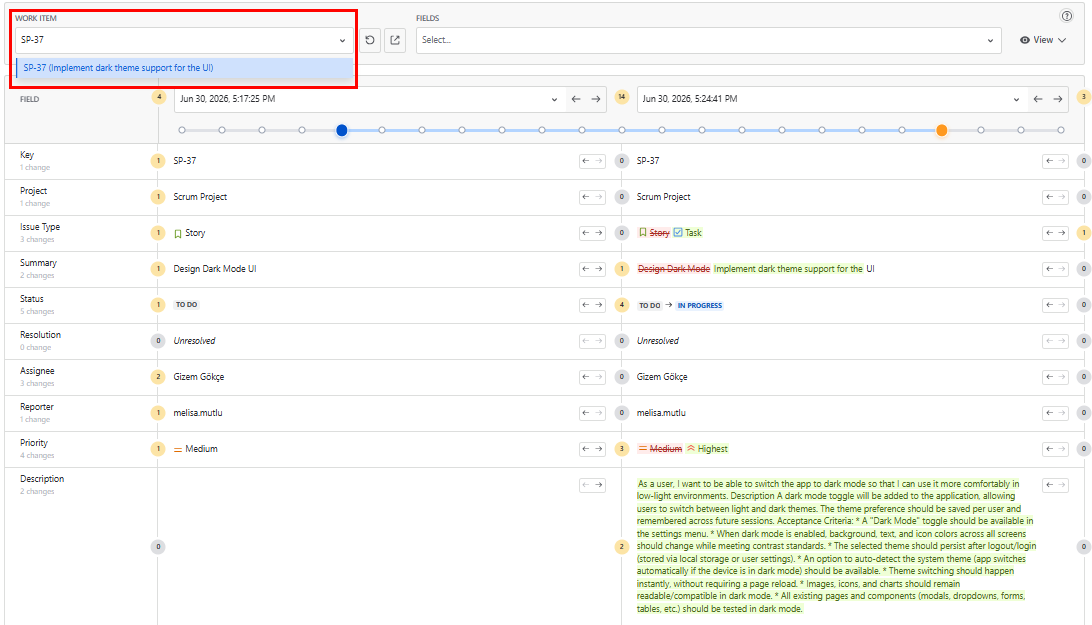
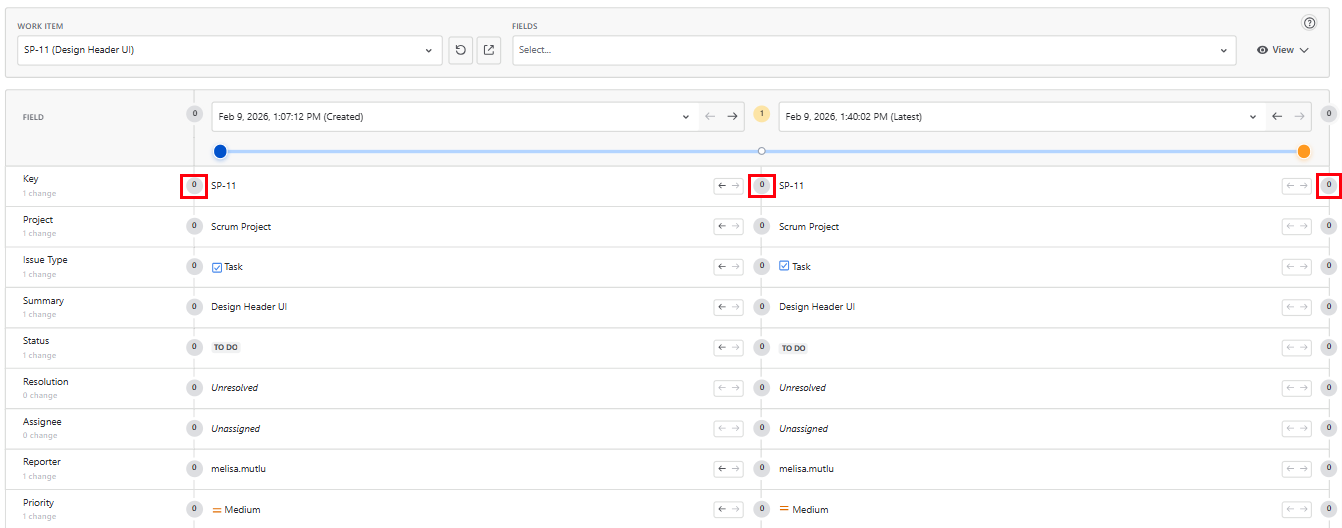
Selecting the Work Item
At the top of the page, you first select a Work Item.
This is the Jira issue you want to analyze, such as a Story, Bug, or Epic.
Choosing Which Fields to Compare
Once the work item is selected, you can decide which fields you want to include in the comparison.
If you open the Fields dropdown and select specific fields, only those fields will be shown in the table.
This is useful when you want to focus on important fields such as Status, Assignee, or Priority.
If you do not select any fields, Compare Dates automatically shows all available fields.
This is helpful when you want a complete overview of the issue or when performing an audit or detailed analysis.
Selecting Comparison Dates
Comparison Dates allow you to select two different moments in time, compare how a Jira issue looked at those exact moments, and see what changed in field values between those two points in time.
By choosing two dates from the work item's history, you can easily see what changed, when it was changed, and how the issue evolved between those points without manually reviewing the issue history.
This makes it simple to understand the past state of an issue, track important changes, and answer questions such as “What was different at that time?” or “How did we get here?”
When selecting a comparison date, the dropdown lists only the timestamps where the selected work item had a change.
This means each option represents a moment when at least one field value was updated, helping you quickly focus on meaningful points in the issue’s history instead of browsing through irrelevant timestamps.
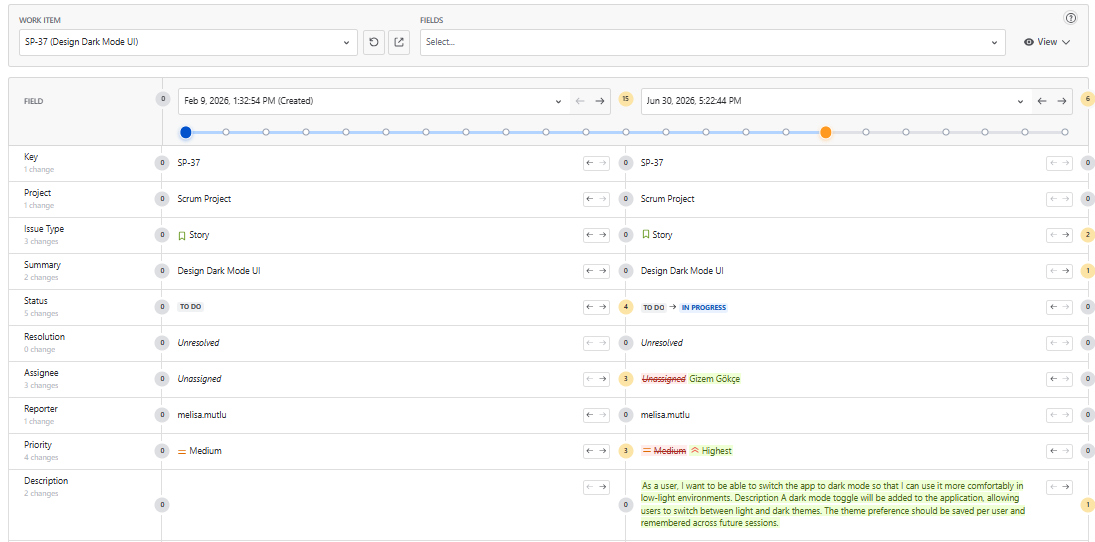
Using the Timeline Control
Above the change list, a timeline slider with dots represents the dates when changes occurred.
-
Each dot represents a specific change date.
-
Clicking on a dot filters the changes to show those made on that exact date.
-
This allows you to quickly navigate between changes without manually searching the history.
When you click a dot, the report updates to show data as of the selected date, syncing the Show me the results as of filter and displaying issue details for that point in time.
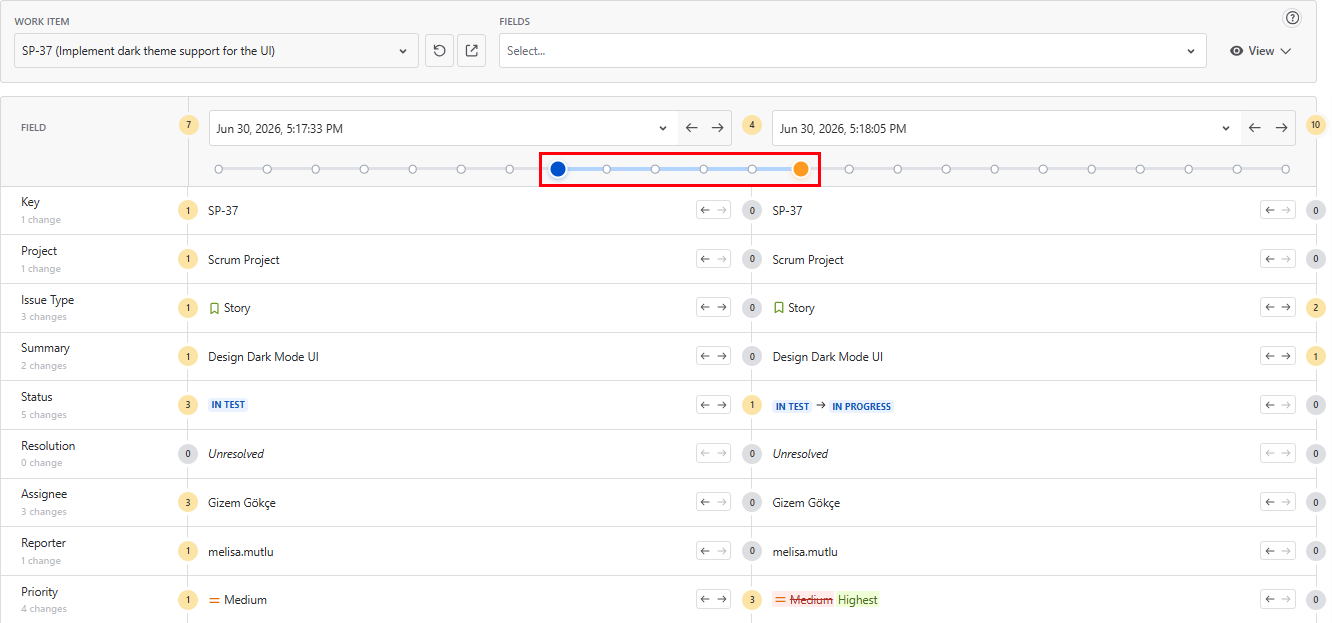
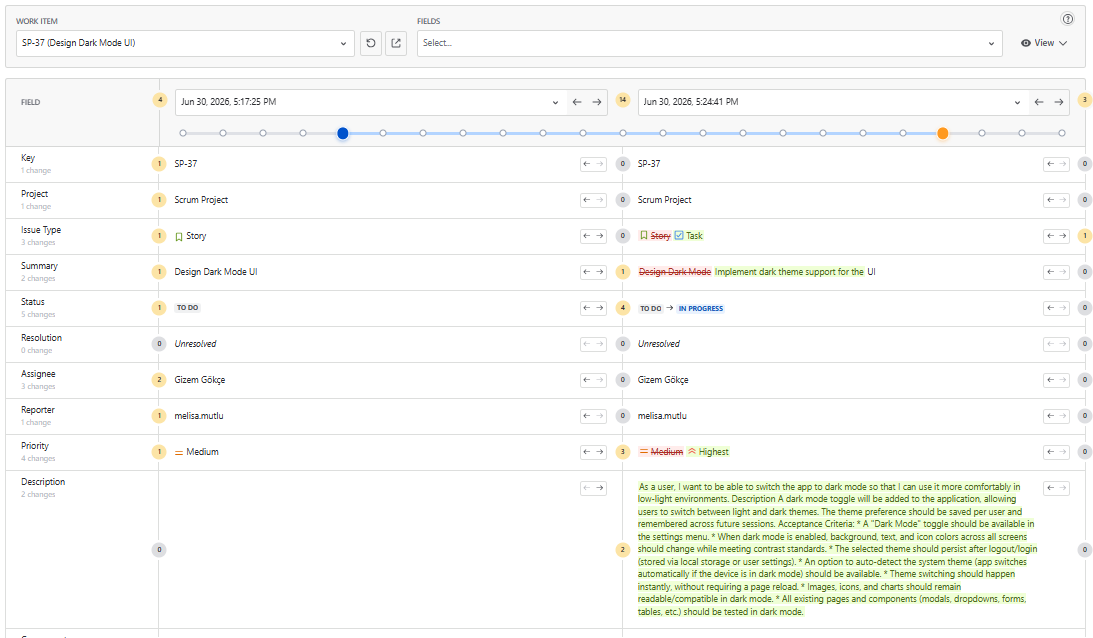
Viewing Field Changes
The field change details view shows all changes on a field, the date each change happened, who made the change, and how the value was updated.
By using the action buttons, you can instantly set the comparison dates to a specific change and see how that change affected the overall state of the issue, without manually searching through the issue history.
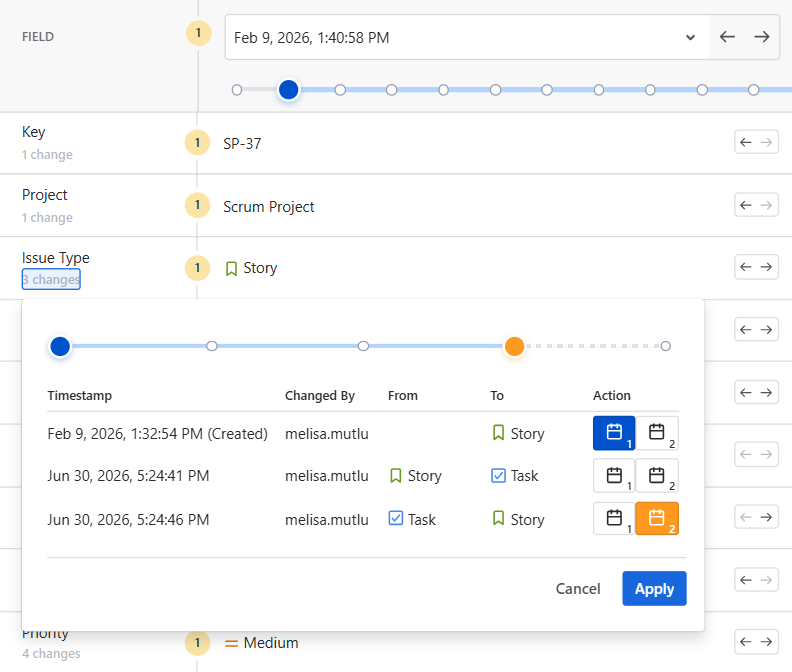
Understanding Change Details
When a field shows a change count, you can click on it to open the change details panel.
This panel provides a deeper view into how that specific field evolved over time and allows you to interact with the comparison dates directly.
Number of Changes Indicators
At the top of the change details panel, you will see three numeric indicators.
These numbers show how changes for the selected field are distributed across time.
-
The first number represents how many times the field changed before the first (left) comparison date.
-
The second number represents how many times the field changed between the selected comparison dates.
-
The third number represents how many times the field changed after the second (right) comparison date.
This breakdown helps you understand not only that a field changed, but when those changes occurred in relation to the selected dates.
Navigating Between Changes
The arrows next to the date selector at the top of each column let you move the comparison date to the previous or next change made on the work item.
Each click selects a new timestamp from the issue’s overall change history, regardless of which field was changed, and updates the comparison to reflect the issue’s state at that moment.
These arrows are useful when you want to review how the entire issue evolved over time before focusing on specific field changes.
Field-level navigation arrows let you jump between the timestamps where a specific field changed, making it easy to analyze that field’s history in isolation.

View Options
The View options let you control how comparison results are displayed, helping you focus on what matters most.
You can highlight differences, hide empty fields, or show only the fields that changed making it easier to review changes quickly and clearly without altering the selected work item or comparison dates.
Show Diff View
Highlights the differences between old and new field values, making changed parts easier to spot.
Filter Empty Fields
Hides fields that have no value on either side of the comparison.
Show Only Modified Fields
Displays only the fields that have different field values for the selected dates.
