
Timepiece Custom Fields are Jira custom fields that display Time in Status data directly on Jira issues. This page explains how to create and configure a Timepiece custom field. For more information about where and how the calculated values can be used, see Using Custom Field Values.
Creating Custom Fields
To create a Timepiece custom field, go to the Fields admin page in your Jira and create a new custom field. While creating the field, select Timepiece - Time in Status Custom Field Type from the Field type options.
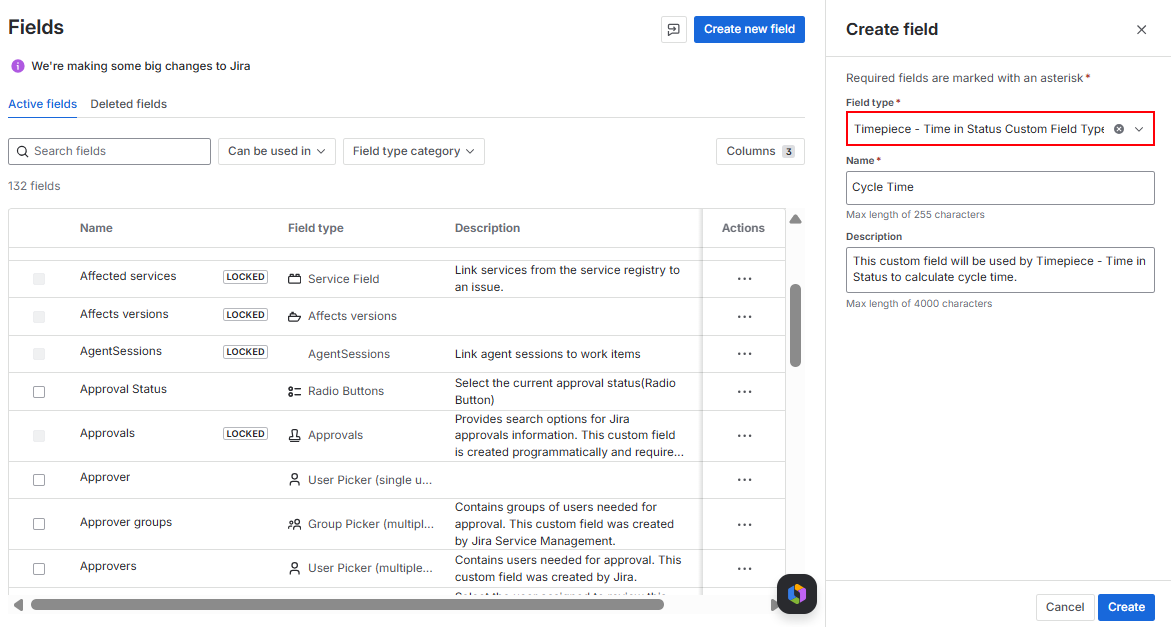
After creating the field, associate it with a configuration scheme and add it to the relevant screens so that it becomes visible on the desired work items.
Once the field is created and configured, it will automatically appear on the Timepiece Custom Fields admin page, where you can manage the field.
Custom field creation is only supported in company-managed projects. You will not be able to create new Timepiece fields in a Team-Managed project; however, any existing Timepiece custom fields can be used in Team-Managed projects.
Configuring Custom Fields
To access the Timepiece Custom Fields configuration, navigate to Jira Admin Settings → Work Items → Fields. From the list of available fields, select the custom field you created, then choose ‘Contexts and default values’ from the Actions menu.
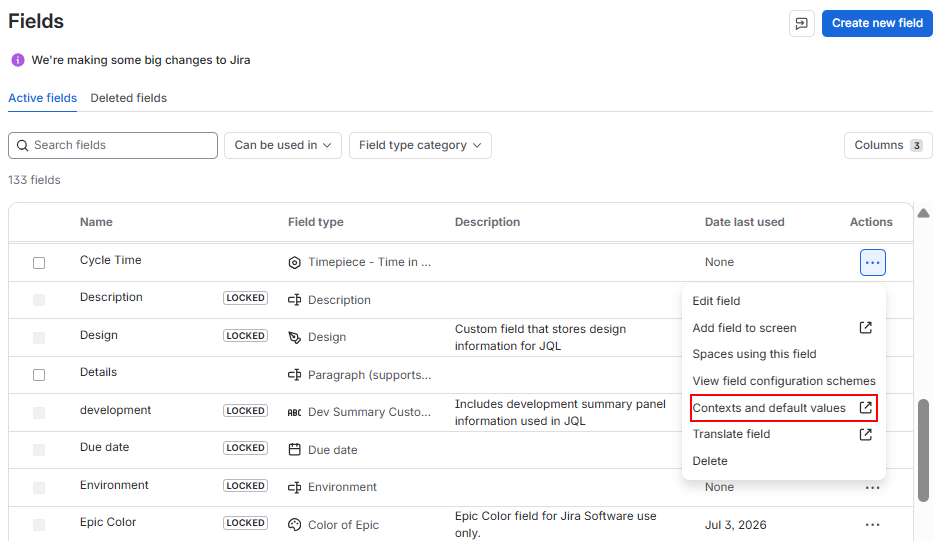
On the screen that opens, click the Edit custom field config link.
Please note that, just like other Jira custom fields, a Timepiece custom field can have one or more contexts with different configurations.
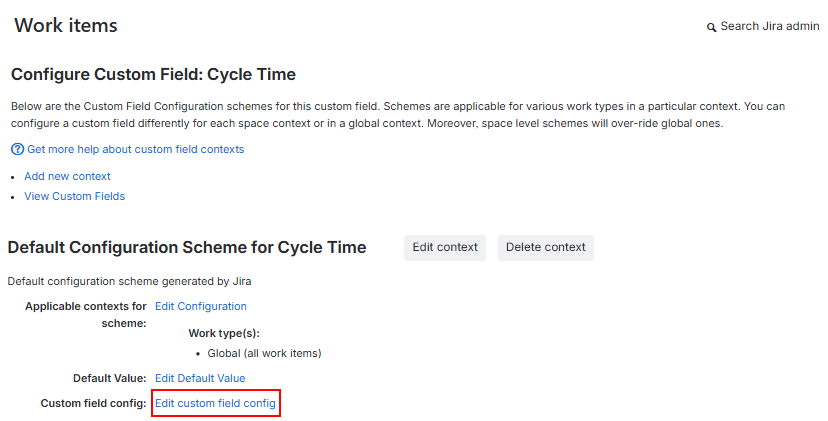
On this screen, you can set up the configuration of the Timepiece Custom Field.
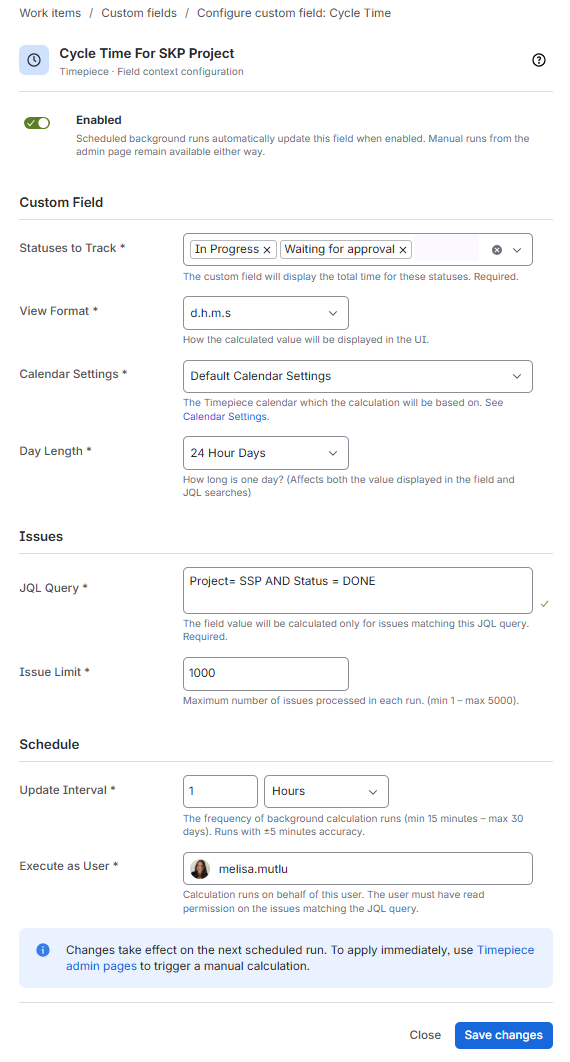
For every custom field, you can configure:
-
Statuses to Track – The statuses for which the duration will be calculated and displayed in the field. You can select one or more statuses. The field will show the total duration spent on those statuses.
-
View Format – How the calculated value will be displayed in the UI. See the View Formats page for available view formats.
-
Calendar Settings – The Timepiece calendar on which the calculation will be based. See the Calendar page for details about the use of calendars.
-
Day Length – How long one day is. This affects both the value displayed in the field and JQL searches. See the Calendar page for details about the Day Length selection.
-
JQL Query – Enter a JQL query to limit the calculation of the Timepiece custom field value to a set of issues. The field value will be calculated only for issues matching this JQL query. Try to use a JQL that filters only the issues where the custom field value is needed. This way, the calculation won’t run for unrelated issues, thus limiting the resource cost and the performance impact of the process.
-
Issue Limit – The maximum number of issues processed in each run (min 1 – max 5000). Timepiece will simply ignore issues above this count if your JQL matches more issues than this number. This setting exists to limit the performance impact of custom field value calculation on your Jira instance.
-
Update Interval – The frequency of background calculation runs (min 15 minutes, max 30 days, runs with ±5 minutes accuracy). Once again, use this setting to limit the performance impact of repeated custom field value calculations on your Jira instance. After all, if your field will be displaying values that will be measured in days, weeks, or months, you don’t need them recalculated 10 times an hour, right?
-
Execute as User – The user on whose behalf the calculation runs. This user must have read permission on the issues matching the JQL query.
After completing the configuration, click the Save changes button and go to the Timepiece Custom Fields page to see a list of your Timepiece custom fields and observe calculation runs.
Related use case articles: