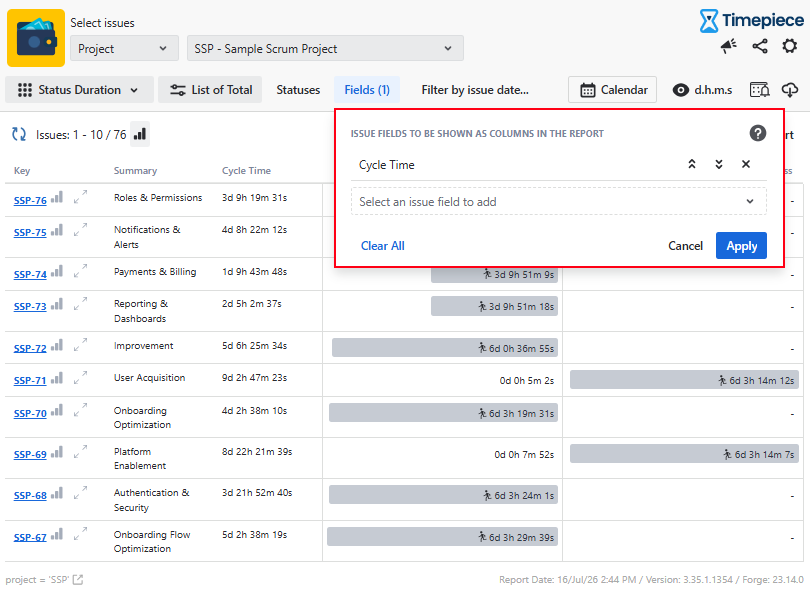
Business Need
You want to see key time metrics such as Cycle Time or Lead Time directly on your Jira work items, so the data is available right where your team works.
Solution
Timepiece Custom Fields calculate the total time that issues spend in selected statuses and write the result directly to each issue as a native Jira field according to a user-defined schedule. This feature can be used to track metrics such as cycle time directly on Jira work items.
Step 1: Create the Custom Field
-
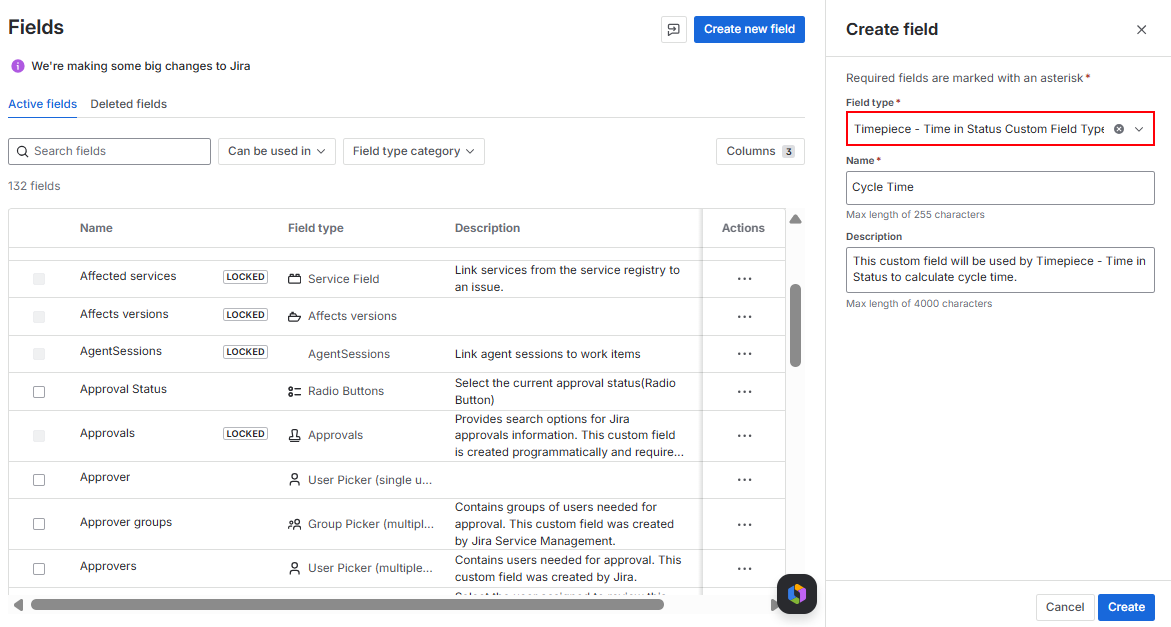
To create a Timepiece custom field, go to Jira Admin Settings → Work Items → Fields and create a new custom field.
-
Select Timepiece - Time in Status Custom Field Type from the available field types.
-
After creating the field, associate it with a configuration scheme and add it to the relevant screens so that it becomes visible on the desired work items.
Step 2: Open the Field Configuration
-
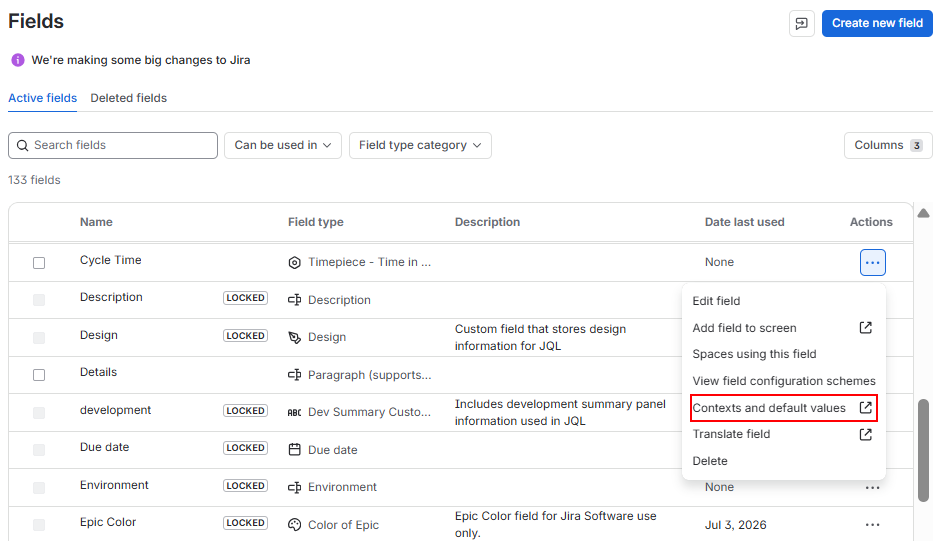
To configure a Timepiece custom field, open Jira Admin Settings → Work Items → Fields.
-
Find the custom field created in the previous step.
-
From the Actions menu, select Contexts and default values.
-
On the screen that opens, click the Edit custom field config link.
Step 3: Configure the Custom Field
-
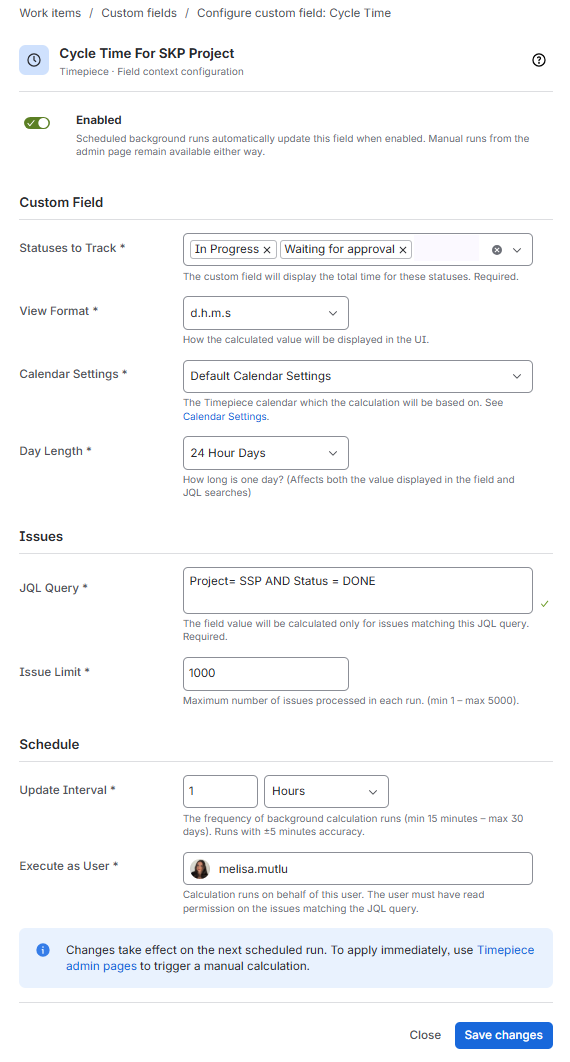
On the custom field configuration screen, configure the settings that define how the metric will be calculated and displayed.
-
Set the Statuses to configure which statuses will be included in the calculated value.
-
For a Cycle Time metric, select the statuses that represent active work, such as In Progress and Waiting for Approval, so that the field calculates the total time spent in these statuses.
-
-
Set the View Format to configure in what unit the values will be displayed on work items.
-
Set Calendar Settings and Day Length if you want to use a custom calendar.
-
Set a JQL Query to define the set of work items for which this custom field will be calculated.
-
Don’t forget that the calculation creates a load on your Jira. So set your JQL Query to include just the issues where the custom field value is really needed. Try to keep unnecessary issues out of the JQL.
-
-
Set the Update Interval to configure the frequency of this custom field value calculation.
-
Don’t forget that the calculation creates a load on your Jira. So try to set an Update Interval where the recalculated value really makes a difference. Avoid too frequent calculations.
-
-
Set an Execution User.
-
The custom field value calculation will run with this user’s security context.
-
Make sure the user can see all the issues selected by the JQL Query.
-
-
After completing the configuration, click Save changes. The field is now ready, and its values will be calculated automatically on the schedule you defined.
Step 4: Run the Custom Field (Optional)
-
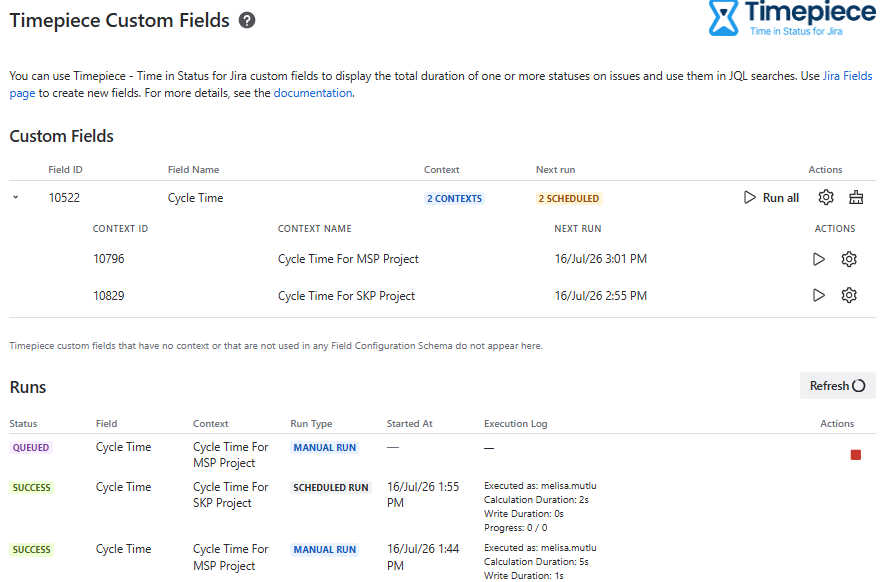
Go to the Timepiece Custom Fields Admin page, where the field is listed along with its contexts and next scheduled run.
-
Either wait for the next scheduled run, or trigger a manual run to calculate the values immediately.
Step 5: View the Metric on Your Issues
Once the calculation completes, the metric is available throughout Jira:
-
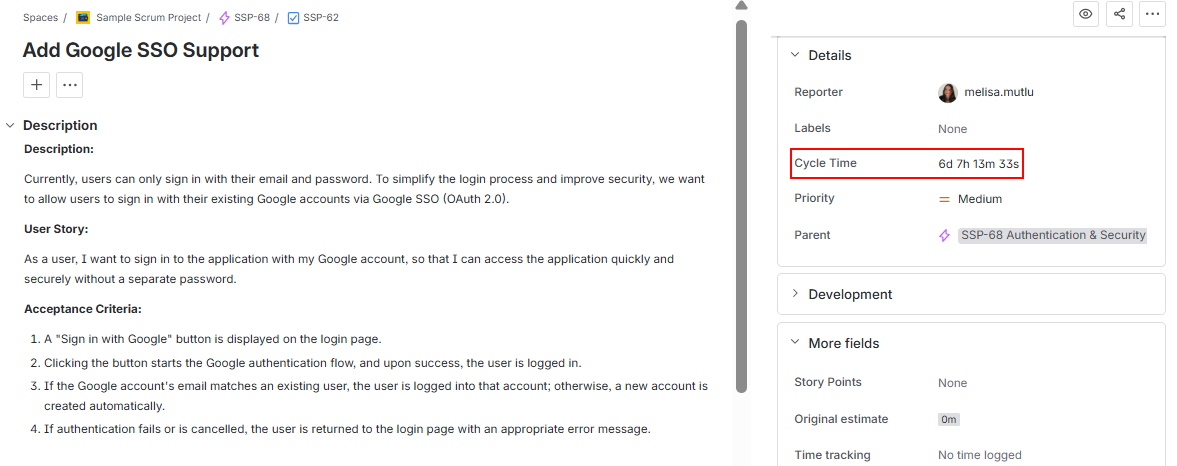
On the work item view, the calculated value appears directly in the field, so the Cycle Time is visible at a glance during day-to-day work.
-
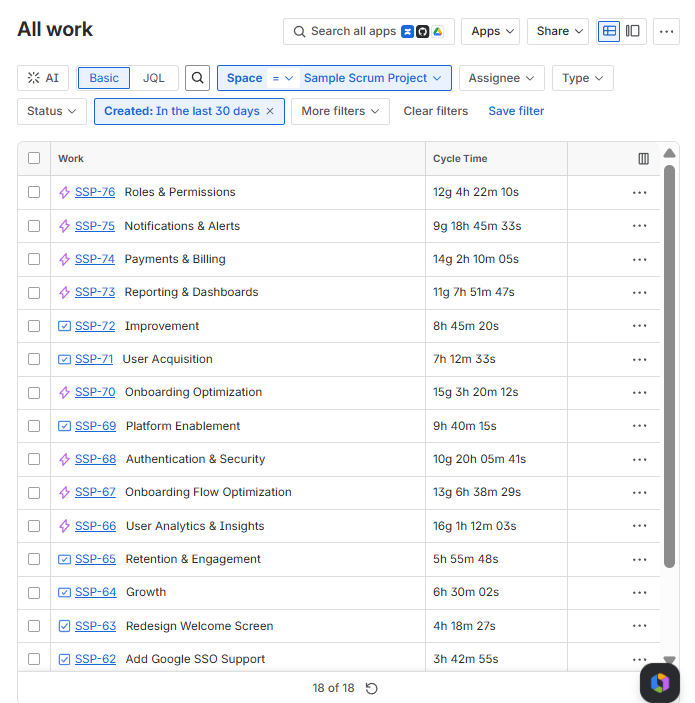
In Jira search results, the field can be added as a column to display the metric alongside your work items.
-
In Timepiece reports, the field can be added as a column to combine the metric with other Time in Status data.