Business Need
Let's presume ...
Each of your issues represents a piece of work that needs to be done. You have a customized workflow. A status in the workflow is used for issues that are waiting in the queue. Once the work on an issue starts, the workflow goes through multiple steps before being completed.
You want to see the Lead Time and Cycle Time for your issues.
Cycle Time: Cycle time is simply the amount of time it takes for a unit of work to go from an In Progress state to a Completed state. The clock “starts ticking” on the cycle time as soon as the work moves from a “Ready” state to an “In Progress” state, and it stops ticking when that work item goes from an “In Progress” state to a “Completed” state.
Lead Time: Lead time is the amount of time it takes for a unit of work to go from an In Queue state (i.e. a customer has requested some work to be done) to a Completed state. The clock “starts ticking” on lead time as soon as the work moves from a “Ready” state to an “In Progress” state, and it stops ticking when that work item goes from an “In Progress” state to a “Completed” state. It includes, and is therefore always longer than, cycle time.
Timepiece offers two different report types to help you with this need:
Solution 1
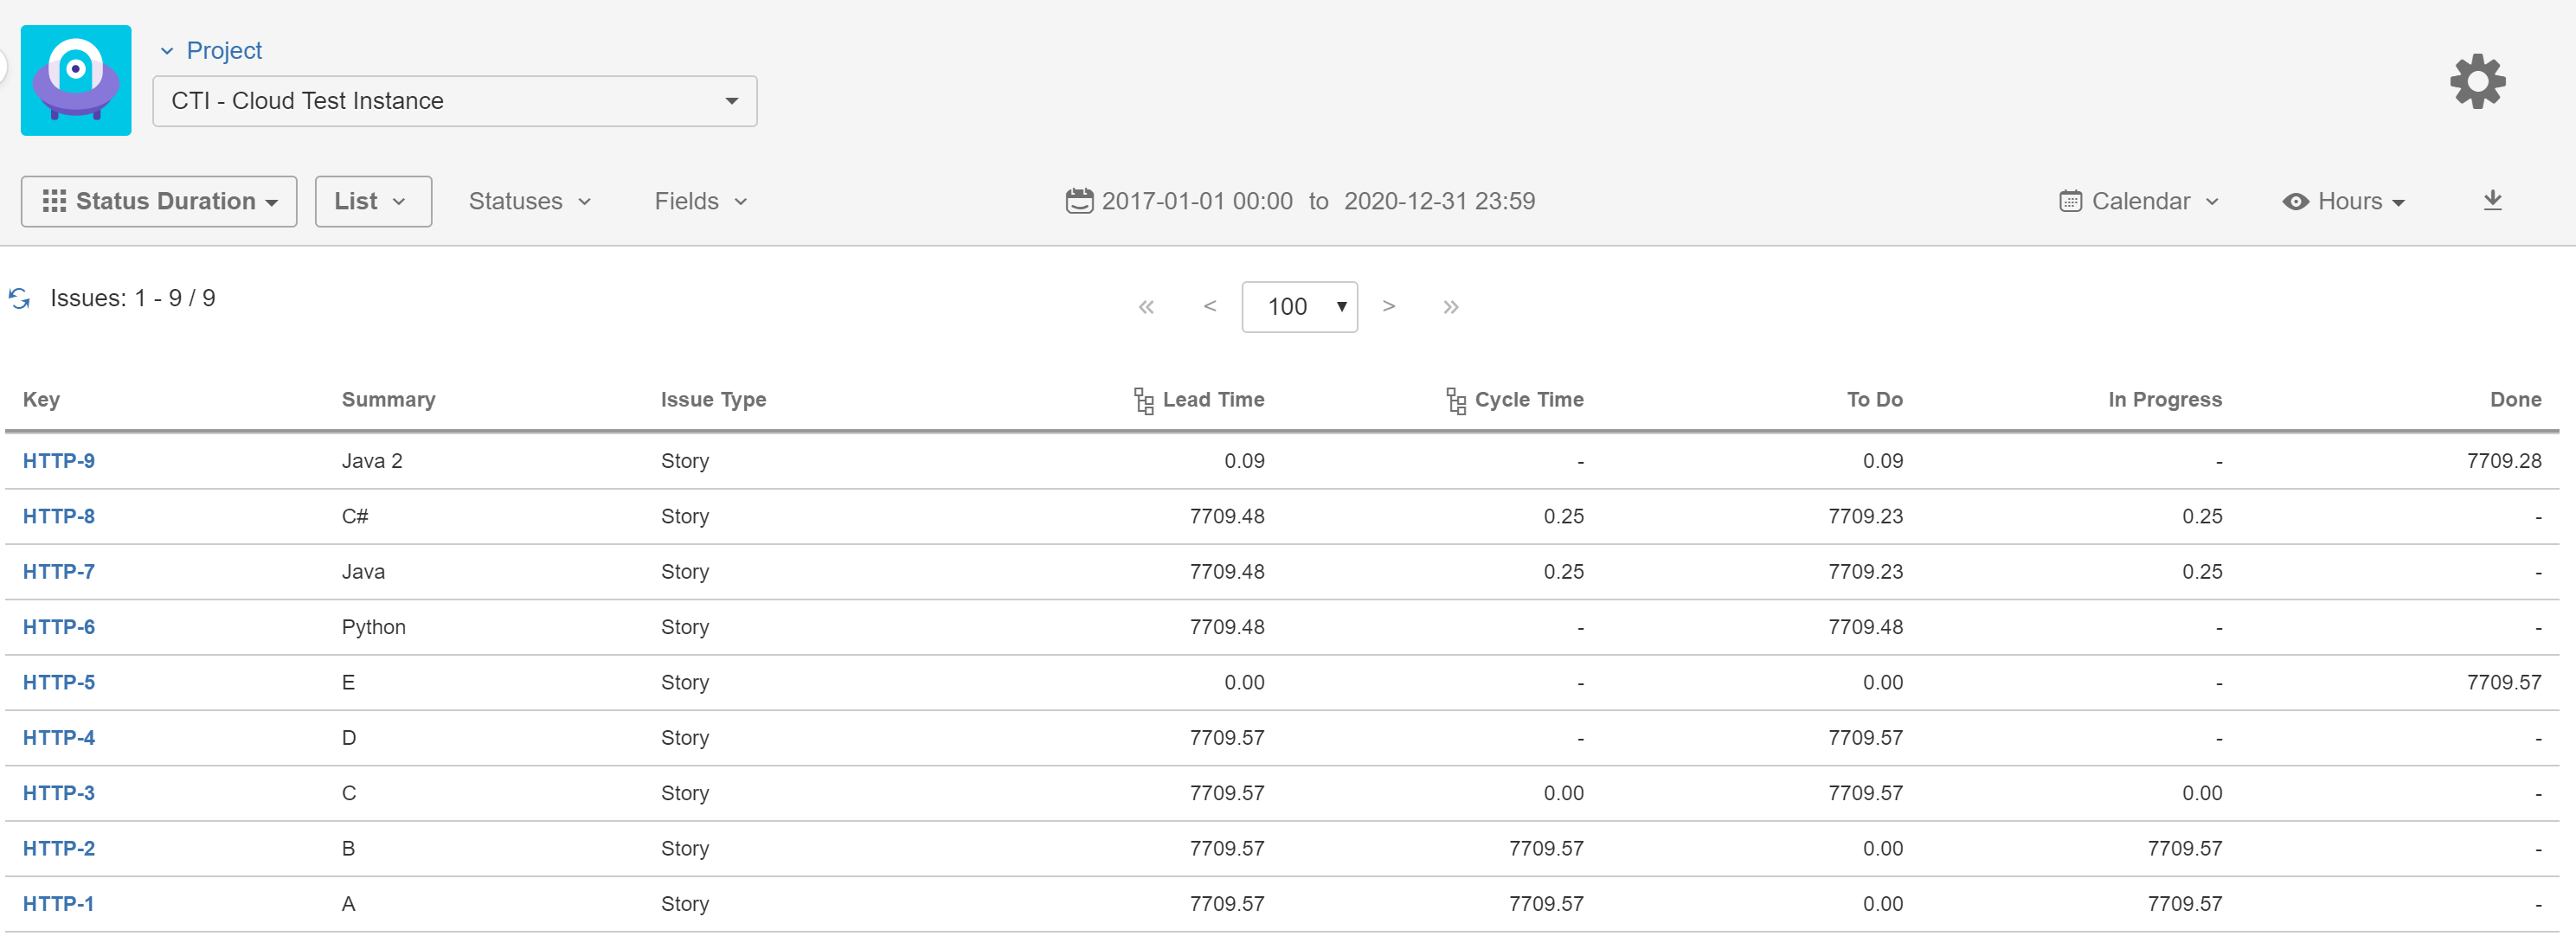
STATUS DURATION report of Timepiece with the Column Consolidation option can be utilized for this purpose.
You should...
-
Open Timepiece reporting page.
-
Select the project in which the issues reside (or set any other filter to get the issues to report on).
-
Switch to STATUS DURATION report.
-
Click the Statuses button
-
Clear any already selected statuses if there are any.
-
Click on Add Consolidated Column button.
-
Enter the name Lead Time for the new column.
-
Click Add Status button under your new column and select a status that should be included in Lead Time.
-
Repeat the previous step untill all statuses that should be under Lead Time are selected.
-
-
Click once more on Add Consolidated Column and create a column for Cycle Time following the same steps.
-
Use the Add Status button to add individual statuses to the report. You can add statuses whether they are included in the consolidated columns or not.
-
Click Apply.
-
The report will show columns for Lead Time and Cycle Time, along with the other statuses you selected.

You can see the Statuses page for details about selecting statuses and creating Consolidated Columns.
You can watch this training video to see how status selection is made and how Consolidated Columns are created.
Solution 2
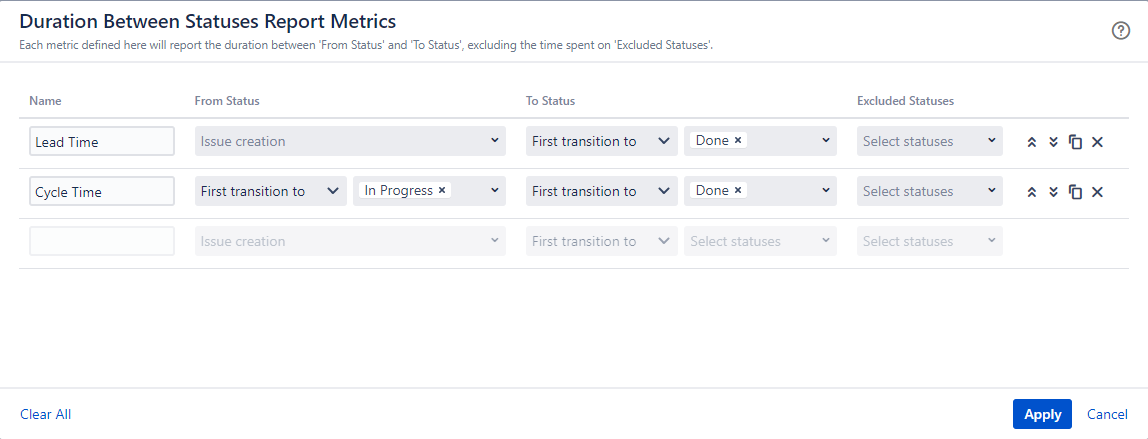
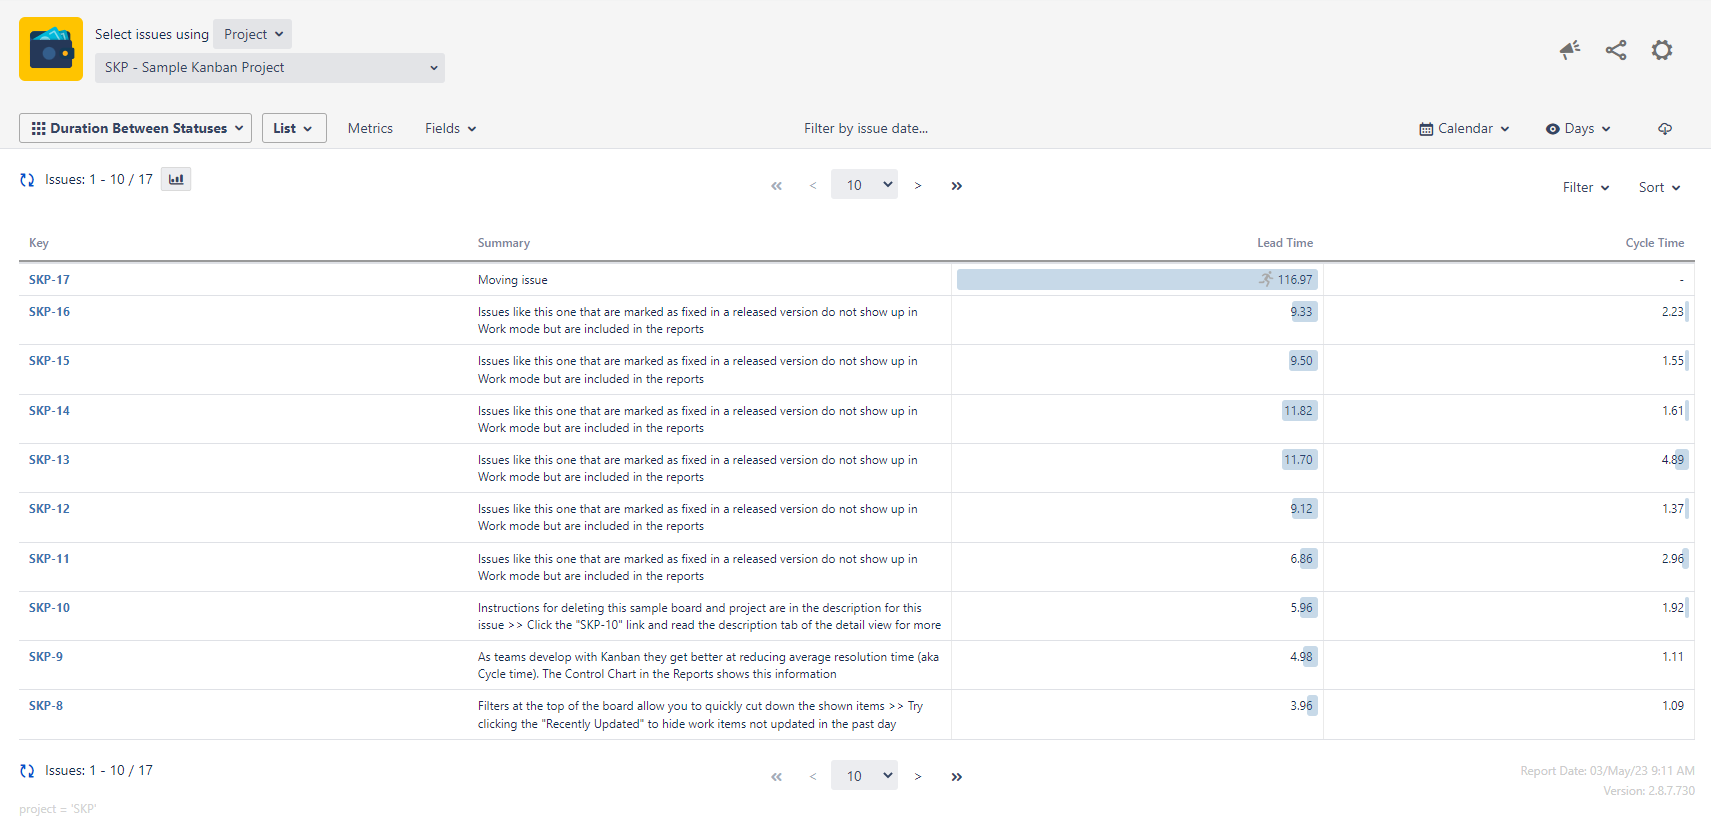
DURATION BETWEEN STATUSES report of Timepiece can be utilized for this purpose.
You should...
-
Open Timepiece reporting page.
-
Select the project in which the issues reside (or set any other filter to get the issues to report on).
-
Switch to DURATION BETWEEN STATUSES report.
-
Click the Metrics button
-
Clear any already selected metrics if there are any.
-
Create a new metric with the name Cycle Time.
-
Select In Progress as the From Status.
-
Select Done as the To Status.
-
-
Repeat the previous steps for any other metrics that you want to create.
-
Click Apply.
-
The report will show a column for Cycle Time, along with the columns for other metrics you defined.


You can see the Metrics documentation page for details about creating metrics.
