
Introduction
The Scheduled Reports feature within Timepiece—Time in Status for Jira automatically generates and distributes reports based on pre-configured parameters. This functionality eliminates the need for manual, repetitive report creation and provides a way to create alarms based on Timepiece data.
Accessing Scheduled Reports
Scheduled Reports can be accessed via the Scheduled Reports & Alarms button on the toolbar of the main Timepiece reporting page.

Creating a New Scheduled Report
To create a new Scheduled Report, click the 'Create new' button at the bottom left corner of the Scheduled Reports & Alarms dialog.
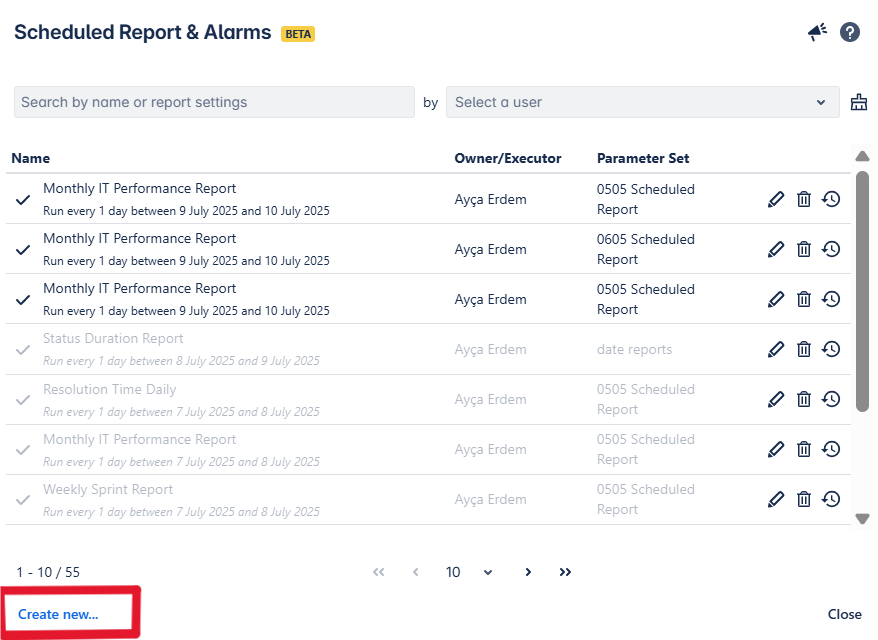
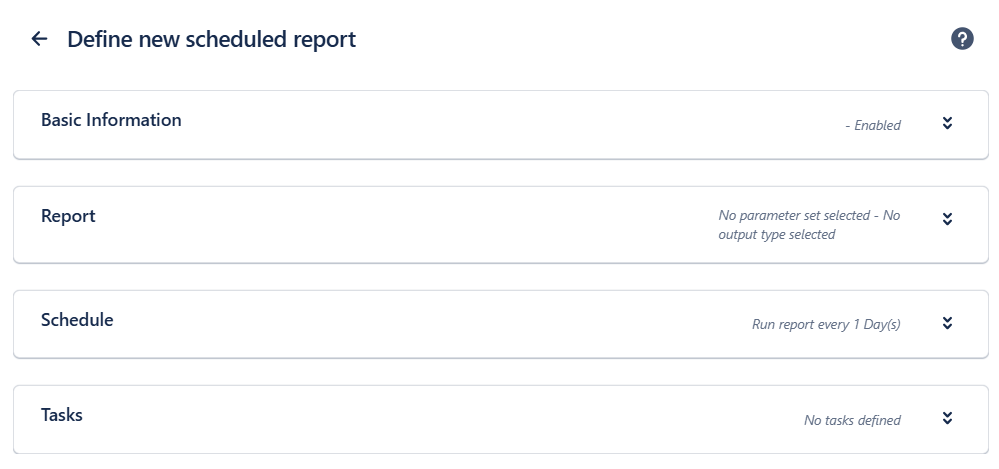
The Create New screen consists of four sections: Basic Information, Report, Schedule, and Tasks.
Basic Information
In the Basic Information section, you enter the report name, an optional description, and select the Owner and Executor.
%20-%20Jira.png?cb=c777d2ac3d00d46d8868be79ae987de4)
What is an Owner?
The Owner is the user who creates the scheduled report or is assigned as the Owner by someone else.
Only the Owner of a Scheduled Report or a Jira Administrator can modify the Scheduled Report configuration.
What is an Executor?
The Executor is the user who runs the report. When a scheduled report is triggered, the system uses the Executor’s Jira permissions to determine what data to include, just as if they manually exported the report. This means the report will only contain issues and fields the Executor has permission to see.
The Executor must also have Timepiece export permission.
The Executor can view the report in the Scheduled Reports list, see its execution history, and download the latest file.
Report Configuration
This section is dedicated to defining the specific content and format of the report to be generated.
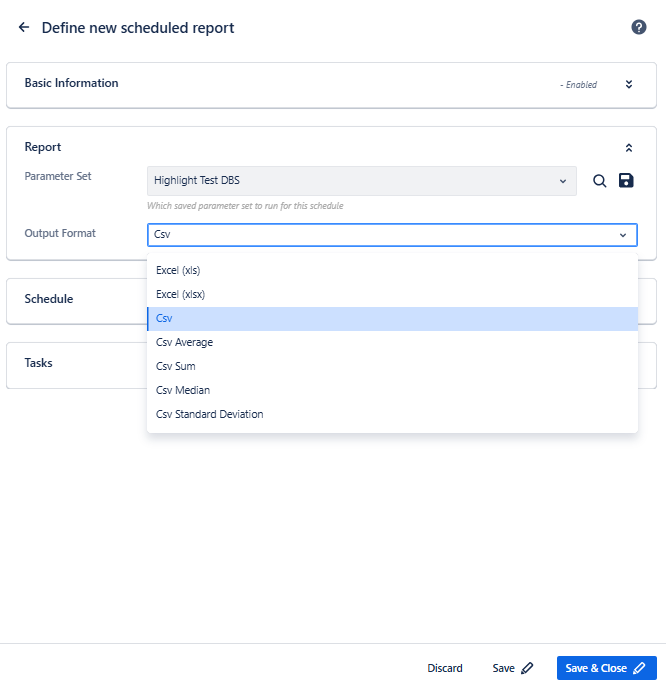
Parameter Set: Select a previously saved Parameter Set. This set includes the report type, parameters, visual settings, and other configurations that determine the report content.
To review the parameters saved within the selected set, click the magnifying glass ( 
To save the current parameters on the screen as a Parameter Set, click the disk icon ( 
Output Format: The supported file formats depends on the report type.
Report Scheduling
This section enables the precise definition of the report's execution frequency and timing.
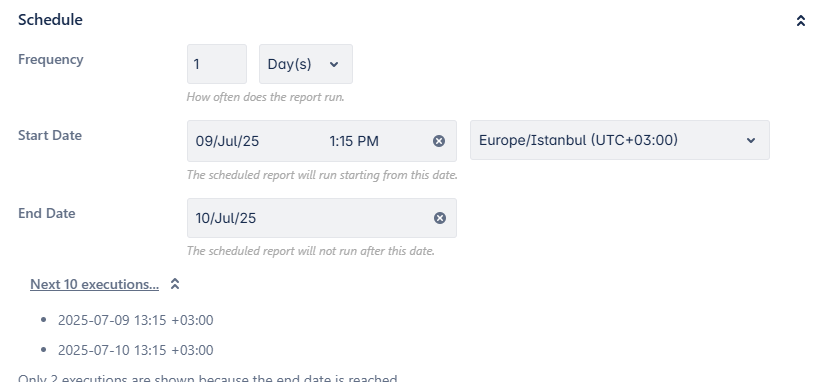
Frequency: Establish the recurrence interval (e.g. hours, days, weeks, months, or years).
Start Date: Specify the exact date, time, and time zone at which the report schedule should start to run.
End Date: Specify the data when scheduled executions should stop running.
A preview of upcoming execution times is automatically displayed below the schedule settings, based on the selected frequency and date range. This helps verify the intended schedule configuration.
Tasks
After defining when and how the report will be run, users can configure what should happen after the report is generated.
Each task consists of two parts:
-
When should this task run? (Condition)
-
What should it do? (Action(s))
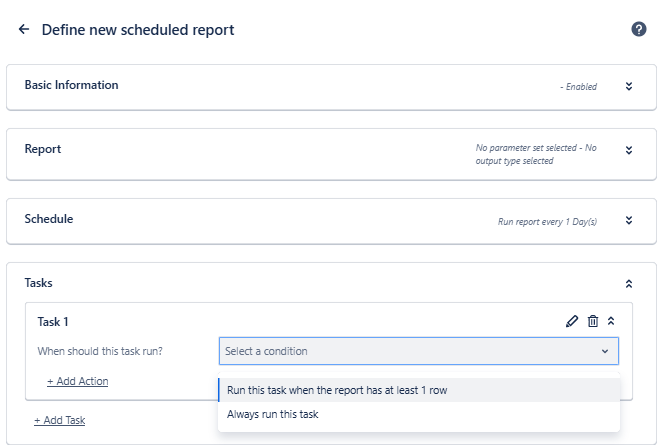
Task Conditions
Select a condition from the "When should this task run?" dropdown menu. This determines the circumstances under which the task will execute:
-
Run this task when the report has at least 1 row.
-
Always run this task.
This provides flexibility in defining different actions depending on the outcome of the report execution.
You can use Scheduled Reports to get alerted only when something important happens.
To do that, add the metrics you want to monitor to your report and apply filters to show only the results that meet your alert criteria (e.g., show only issues with Cycle Time longer than 5 business days). Then, create a Scheduled Report task and select the condition 'Run this task when the report has at least 1 row'.
Now, the report will run on schedule, but you'll only get a message when there’s data that requires your attention.
Task Actions
Once the condition is defined, the user can add one or more actions under the same task. Each action specifies what will happen when the condition is met. Multiple actions can be added under a single task, or users may define multiple tasks with different conditions.
Send download link via e-mail
This action allows you to send the generated Scheduled Report's download link as an e-mail to a group of preconfigured users.
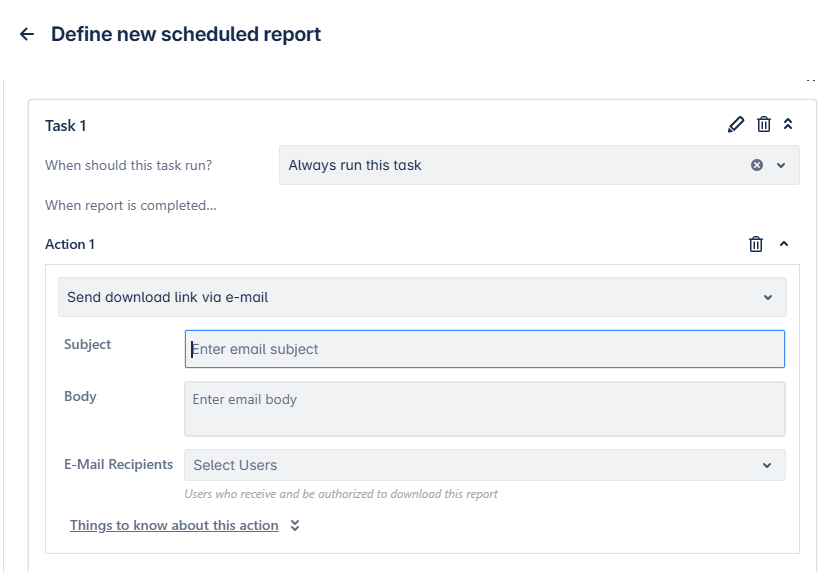
The subject and body are the subject and body of the mail message.
The E-mail Recipients are Jira users who will be allowed to use the link to download the generated file.
Things to know about this action:
-
This action does not send the file itself. It sends an e-mail that contains the link to download the file.
-
The e-mail will be sent from noreply@obss.tech. Make sure messages from this address are not blocked or are not marked as spam.
-
For security, only users selected in the “e-Mail Recipients” list will be allowed to download the file using the link.
-
The report file will also be visible (and downloadable) for
-
the Executor user in the “Previous Exports” tab under the “Export” window of the main Timepiece page.
-
The file will be subject to the same storage conditions as other file exports. It will be automatically deleted after 24 hours.
Send download link to Slack
This action allows you to send the generated Scheduled Report's download link as a message to a Slack channel.
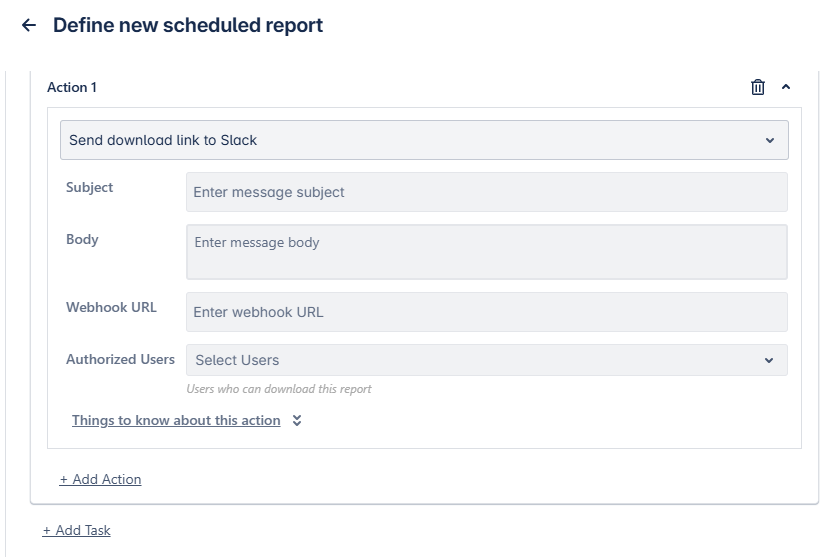
The subject and body are the title and body of the Slack message.
The Webhook URL is the URL to send the message to a Slack channel. You'll need to create a webhook URL from Slack as described here.
The Authorized Users are Jira users who will be allowed to use the link to download the generated file.
Things to know about this action:
-
This action does not send the file itself. It sends a message that contains the link to download the file.
-
For security, only users selected in the “Authorized Users” list will be allowed to download the file using the link.
-
The report file will also be visible (and downloadable) for the Executor user in the “Previous Exports” tab under the “Export” window of the main Timepiece page.
-
The file will be subject to the same storage conditions as other file exports. It will be automatically deleted after 24 hours.
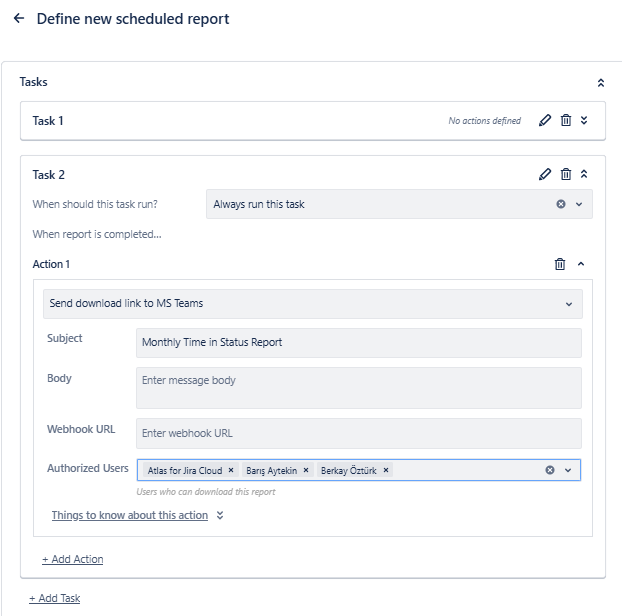
Send download link to MS Teams
This action allows you to send the generated Scheduled Report's download link as a message to MS Team workspace/channel. To do that, you need to create incoming webhook to Teams. To learn more about MS Teams Webhook, click here.
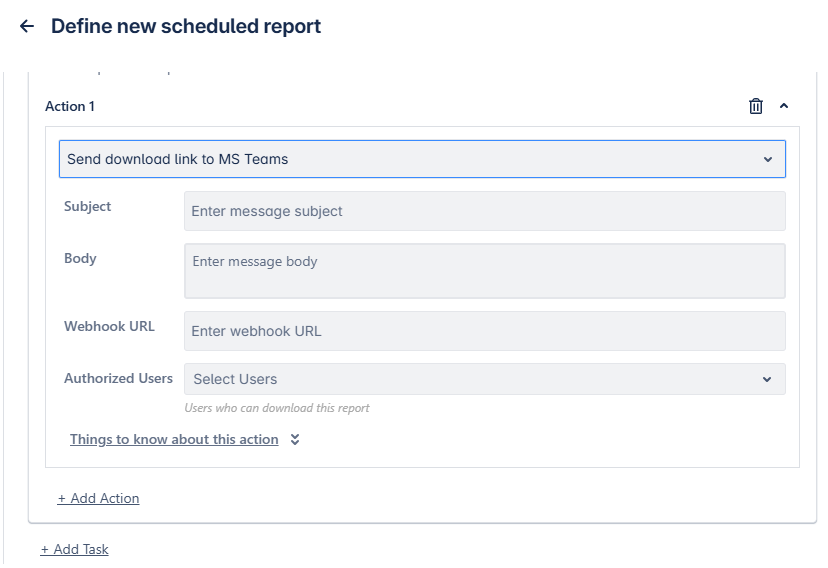
The Subject and Body are the title and body of the MS Teams message.
The Webhook URL is the URL to send the message to an MS Teams channel. You'll need to create a webhook URL from MS Teams as described here.
The Authorized Users are Jira users who will be allowed to use the link to download the generated file.
Things to know about this action:
-
This action does not send the file itself. It sends a message that contains the link to download the file.
-
For security, only users selected in the “Authorized Users” list will be allowed to download the file using the link.
-
The report file will also be visible (and downloadable) for the Executor user in the “Previous Exports” tab under the “Export” window of the main Timepiece page.
-
The file will be subject to the same storage conditions as other file exports. It will be automatically deleted after 24 hours.
-
Timepiece messages sent to MS Teams are compatible with the default message body template. Be careful if you want to modify the message template in your workflow. An incompatible message template will prevent messages from being delivered.
-
Make sure your workflow allows triggering by "Anyone" since Timepiece is not a member of your team.
Getting the Report Results
You can download the output of a scheduled report after it has been successfully executed.
There are three ways to get the report results:
-
Delivery Methods (e-mail, MS Teams, Slack):
If the report was configured to be sent via e-mail, Microsoft Teams, or Slack, recipients will receive a message containing a link to the generated report. The link will take the user to a download page where authorized users will be able to download the generated file.
If the report execution fails, no download link will be generated. In that case, an error message will be shown in the execution history.
-
From the Scheduled Reports screen:
To download a scheduled report, go to the Scheduled Reports list and click Show Executions. For each successful run, a download link will appear.
Only the executor can download the report with this method.
-
File Exports Window
As a third alternative, you can download the report by clicking the 'Export' icon on the app's main page. You'll see Scheduled Reports on the 'Previous Exports' tab.
Only the executor can download the report with this method. To learn more about exporting reports, check out this page.
Scheduled Reports Execution History & Logs
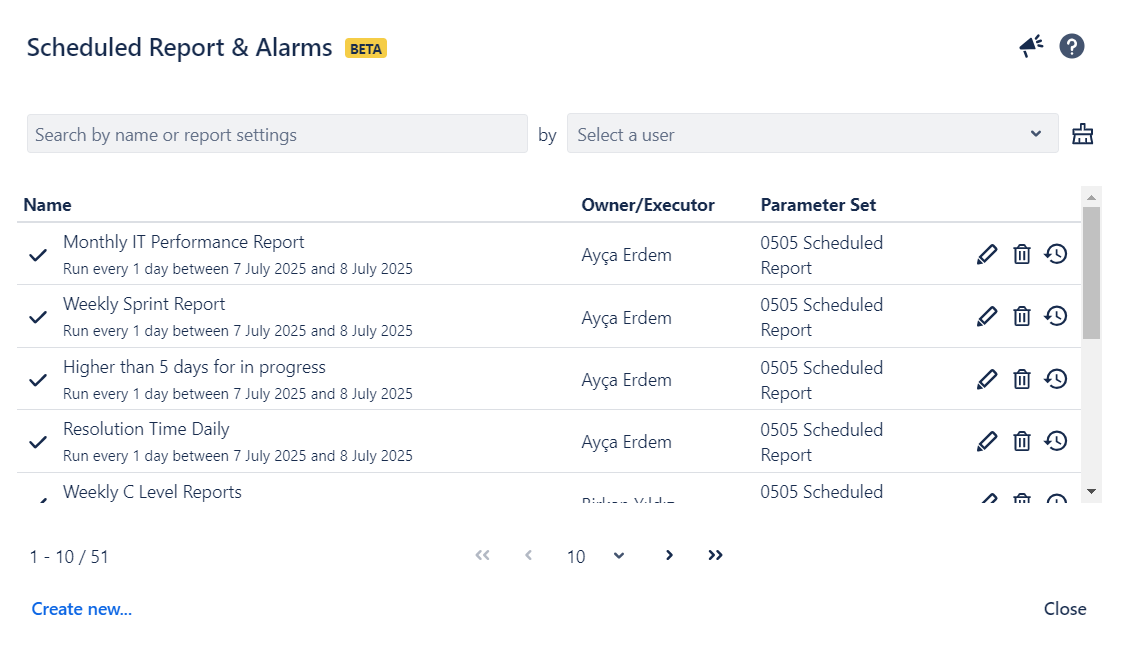
When you click Scheduled Reports & Alarms icon on the app's main page, you can access list of all Scheduled Reports accessible to the user. Key information displayed for each report includes its name, designated Owner, associated parameter set, and schedule frequency.
To facilitate efficient management, the list can be filtered by Owner or searched by report name using the provided search bar.
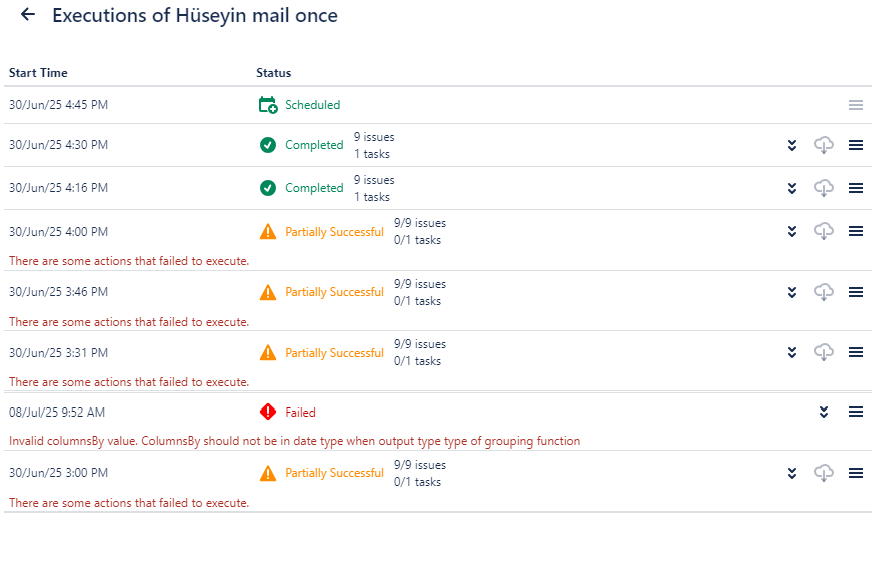
Execution History
Use the clock icon ![]()
-
Execution date and time
-
Status (e.g., success, failure)
-
File download link (if execution was successful)
-
Error message (if execution failed)
-
Execution Logs
Expanding an entry via the chevron down ![]()
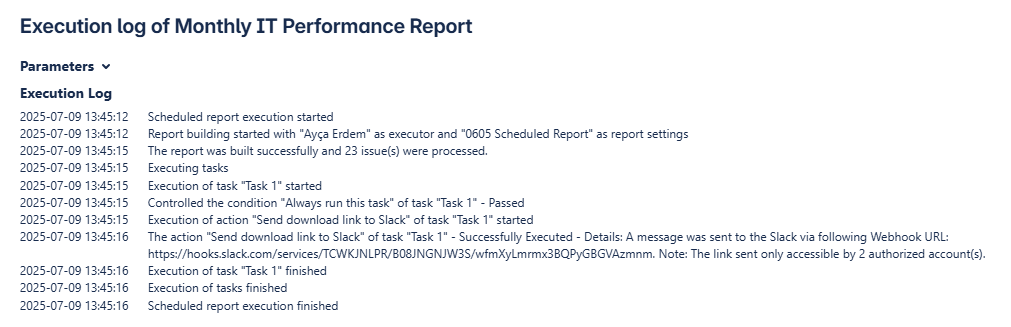
Viewing Detailed Execution Logs
For an in-depth analysis of a specific execution, click the hamburger ( ![]()
Access and Addon Settings
For details on who can view or manage Scheduled Reports and how to control access, click here.
To view and manage addon settings, click here.