
Summary
This document summarizes the simple steps to follow for getting Timepiece data into PowerBI, using the PowerBI Desktop App.
This document utilizes the Public REST API provided by Timepiece.
Configuration
Create a new Query
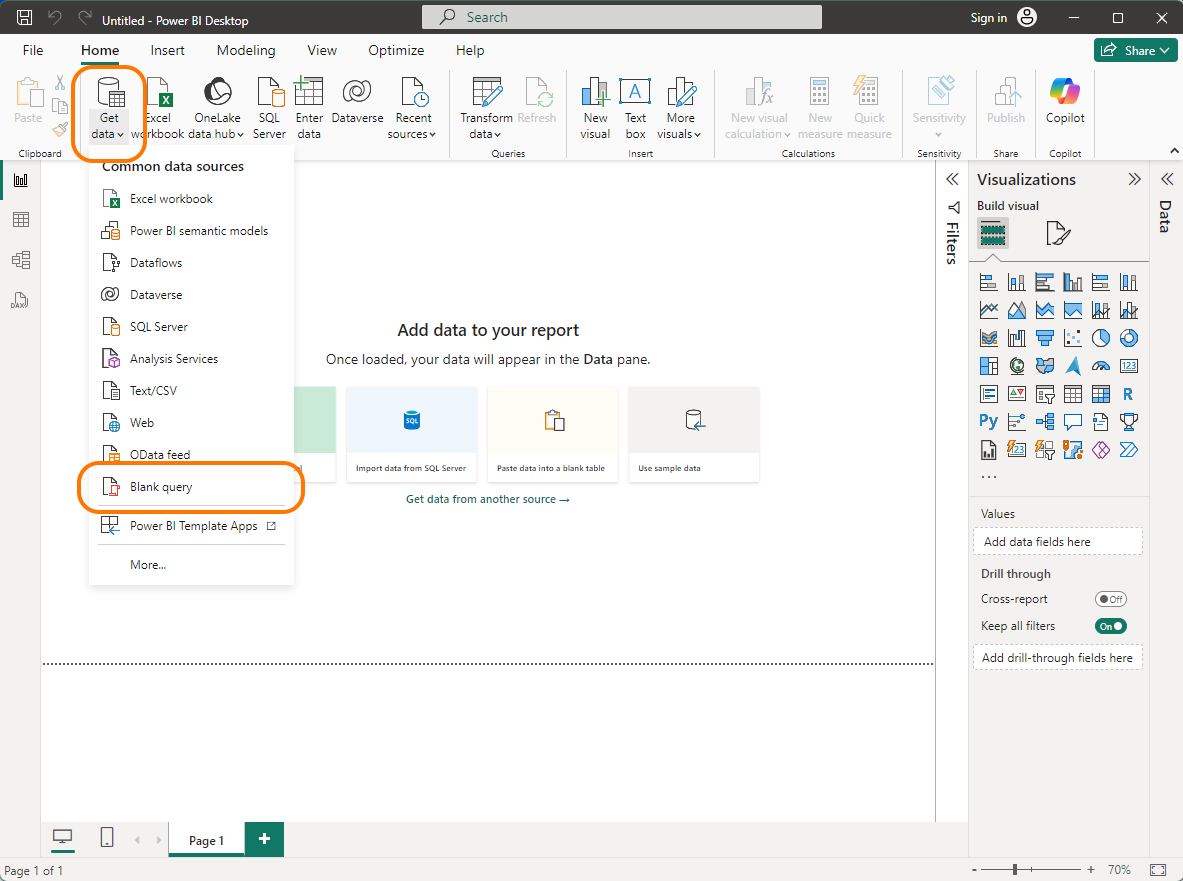
Open PowerBI Desktop App.
Click "Home >> Get Data >> Blank Query"
Configure the Query using the Advanced Editor
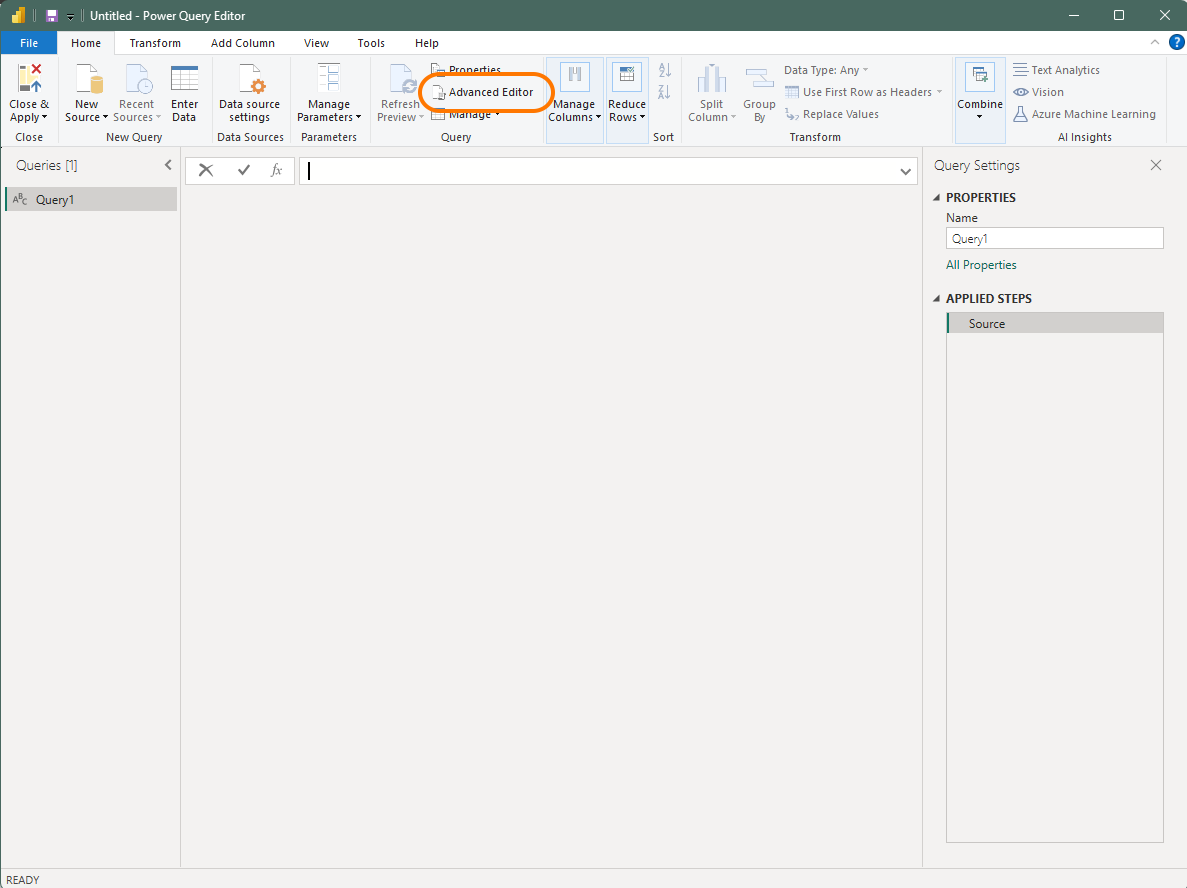
When the "Power Query Editor" window opens, Select "Advanced Editor".
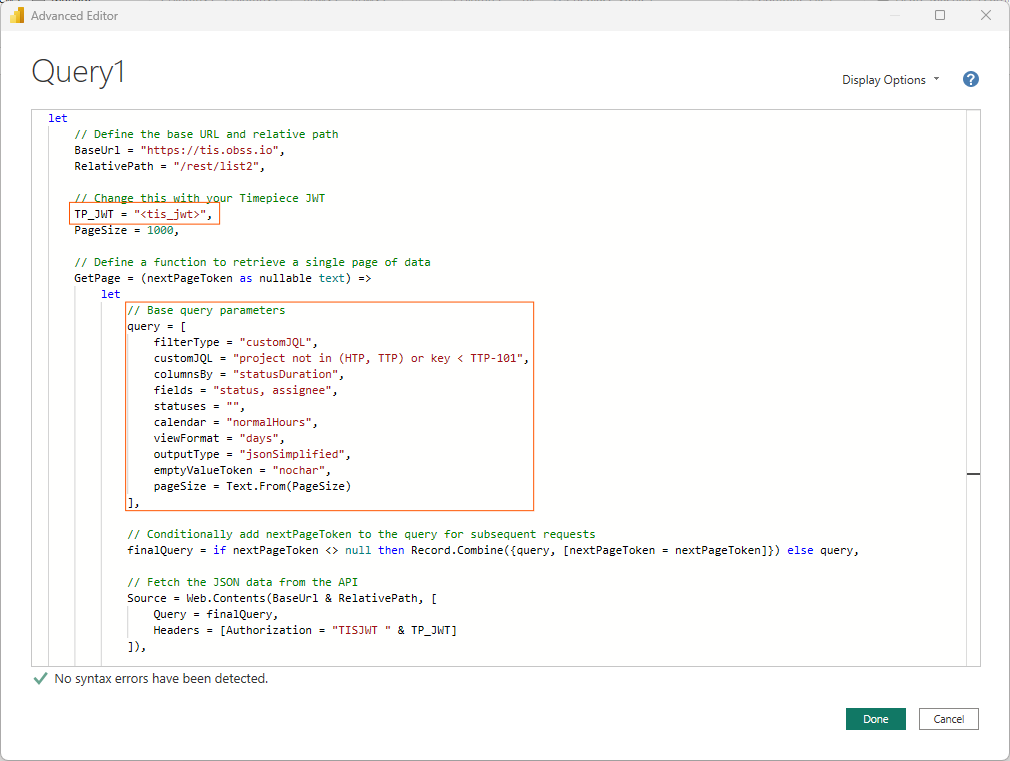
When the "Advanced Editor" window will opens, enter the sample query text below.
-
Adjust the values of the data query parameters according to your needs.
-
Some common parameters are given in the query text below. Change their values according to your use case.
-
You are recommended to start with a JQL query that returns a small number of issues (preferably no more than a few hundred issues). That will keep the query run times short and speed up your initial configuration. Change the query to a large one (if needed) when all the configuration described in this document is complete.
-
-
Replace "<tis_jwt>" in the query with your Timepiece JWT token.
-
See this document about creating TIS JWT tokens.
-
-
Don't change the "BaseUrl". It should always point to "https://tis.obss.io".
-
This is the Timepiece service URL.
-
-
Don't change the "RelativePath".
-
This script uses the "/rest/list2" endpoint to get data in pages of 100 issues.
-
-
Don't change the "PageSize".
-
It should remain 1000, as this is the largest allowed page size.
-
-
See the "Parameters" section in this document about the REST API parameters you can use and their possible values.
-
Run & Save the Query
Click the "Done" button on the Query windows when your modifications are complete.
-
PowerBI will start pulling data automatically.
-
Power BI Desktop app shows some visual cues to indicate that a query is running. Unfortunately, it doesn't provide a way to see progress or remaining time estimation.
-
The query might take a long time to complete, based on the number of issues in your query.
-
The performance of the query depends on the power of your computer, your network connection, and the current load on Timepiece Service and your Jira Cloud.
-
In our tests, our wait times were roughly 5 seconds for every 1000 issues.
-
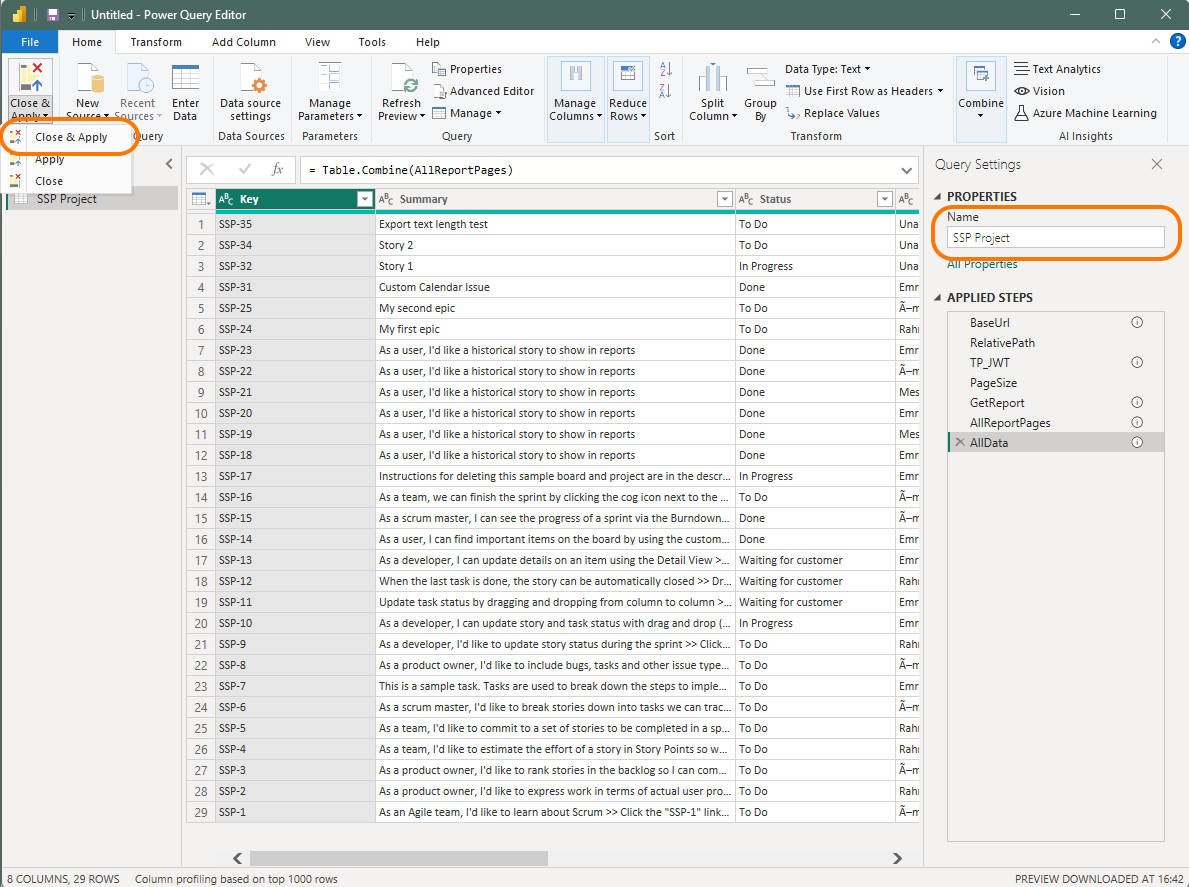
When the query is completed, you should be back to the "Power Query Editor" window.
-
You can set a name for your query using the "Properties" panel.
-
Click "Close & Apply >> Close & Apply" when you're done.
-
PowerBI will most likely start running the data query again.
See the Results
When the query is completed, you should be back to the main "Power BI Desktop" app window.
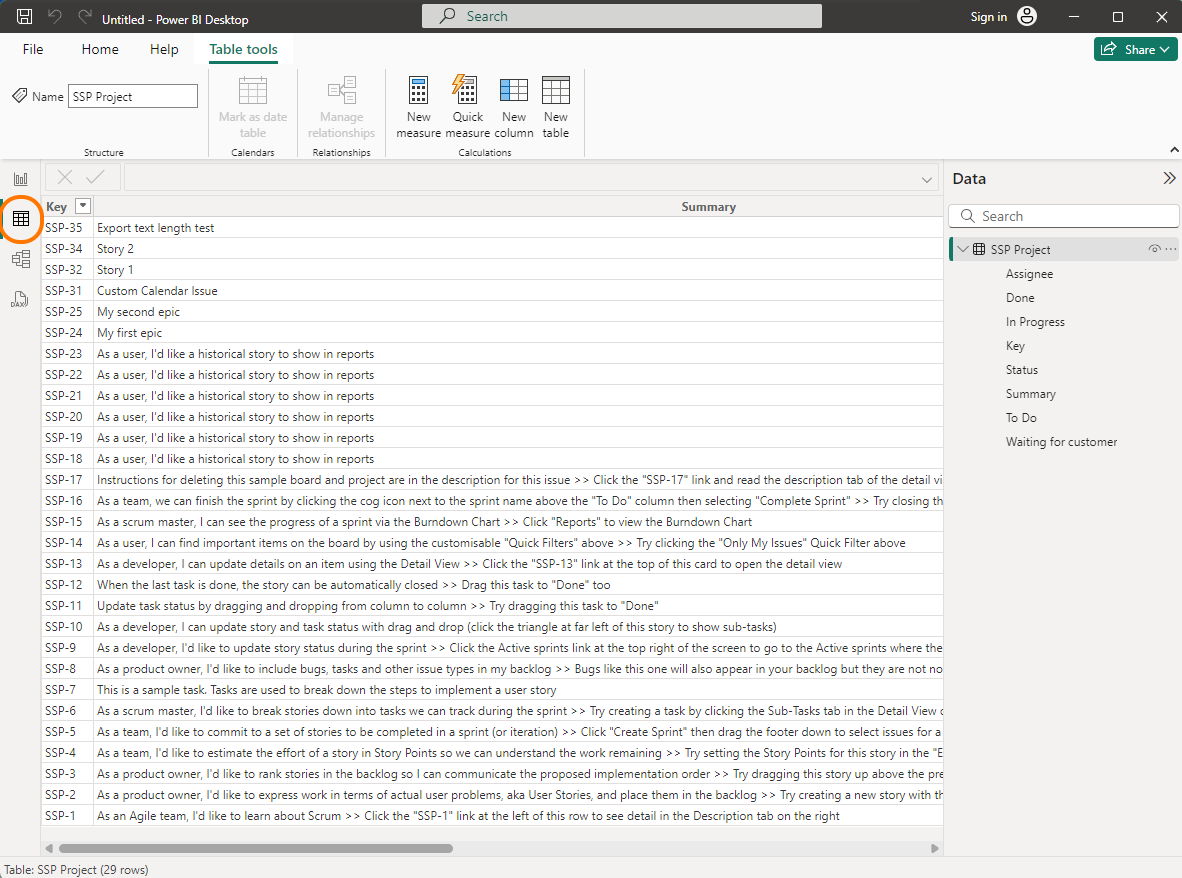
You can use the "Table View" tab to see your query results.
Edit and Refresh the Query
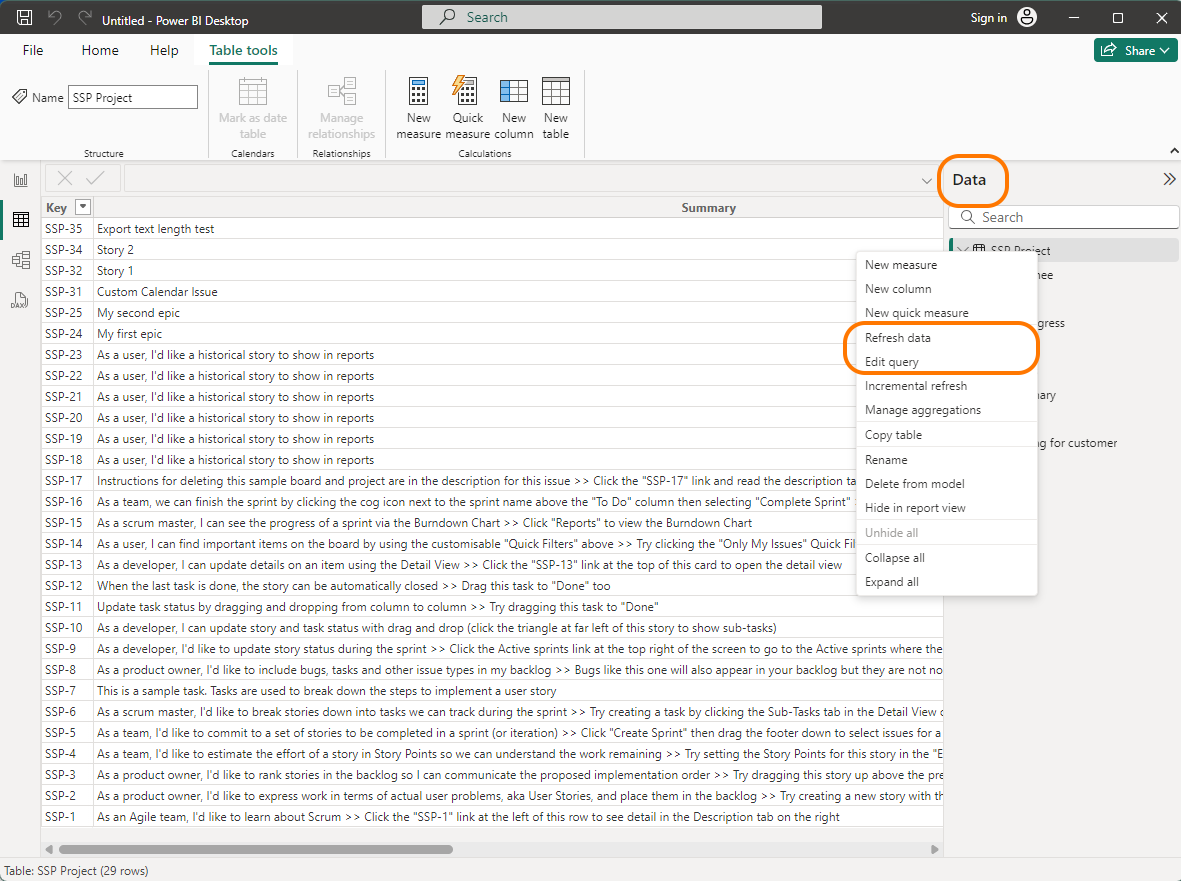
You can use the "Data" panel and right-click on the query name to run the query again or edit the query using the "Power Query Editor".
Save your Project
You have configured your data query and pulled data, you can use the "File >> Save" menu to save your Power BI project.
Now you can do some PowerBI magic to analyze your data.