Business Need
You need an automated process that automatically closes work items that have remained in the Resolved status for more than 5 days, ensuring that resolved items are regularly cleaned up and the work list stays up to date.
Solution
“STATUS DURATION” report type of Timepiece, combined with Jira Automation, can be used for this purpose.
Step 1: Configure and Save the Timepiece Report
First, create a Timepiece report...
-
Open the Timepiece reporting page.
-
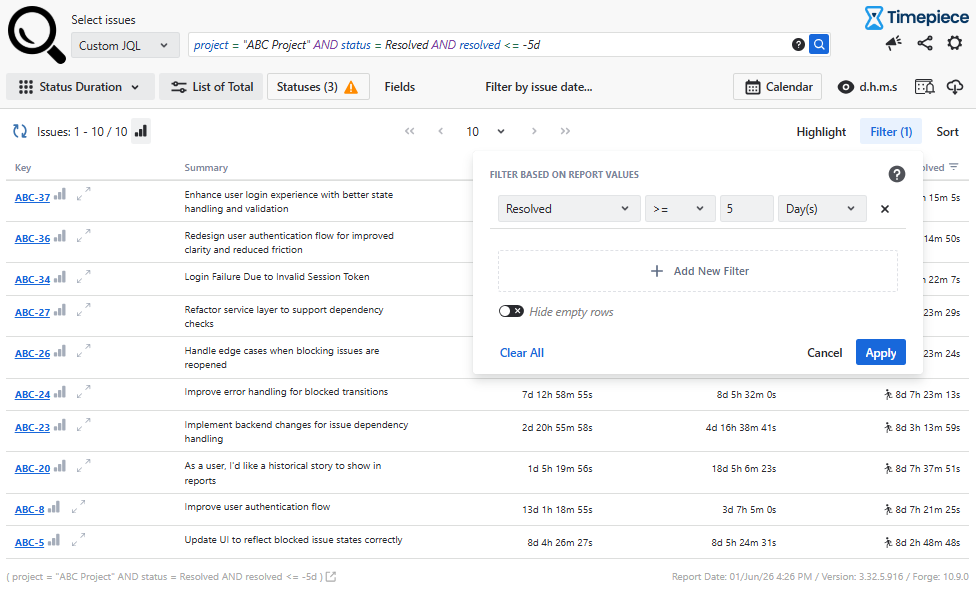
Select Custom JQL filter type and set a JQL query like
project = "ABC Project" AND status = Resolved AND resolved <= -5d-
This query makes sure Timepiece returns results for issues that are in the Resolved status and were resolved earlier than 5 days ago.
-
-
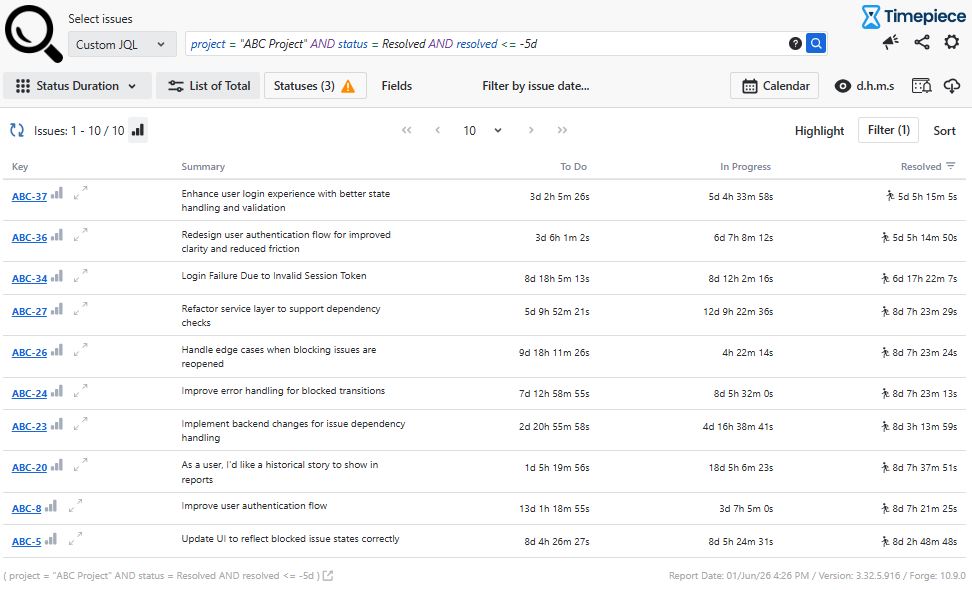
Switch to the “STATUS DURATION” report type.
-
(Optional) Select your business calendar if you have one.
-
Filters issues that have a "Resolved" status value for more than 5 days.
-
Based on the JQL query above, the report is already set to only process issues resolved earlier than 5 days. But if you selected a custom calendar, the results will also include issues with Resolved status times less than 5 days. This filter ensures that we only get results for issues that have spent more than 5 days in the Resolved status.
-
-
Go to settings and save it via "Save report parameters".
-
The parameter set name should be like "Auto Closed Resolved Issues".
-
Make sure you select the "Share with everyone" option so others can use the param set as well.
-
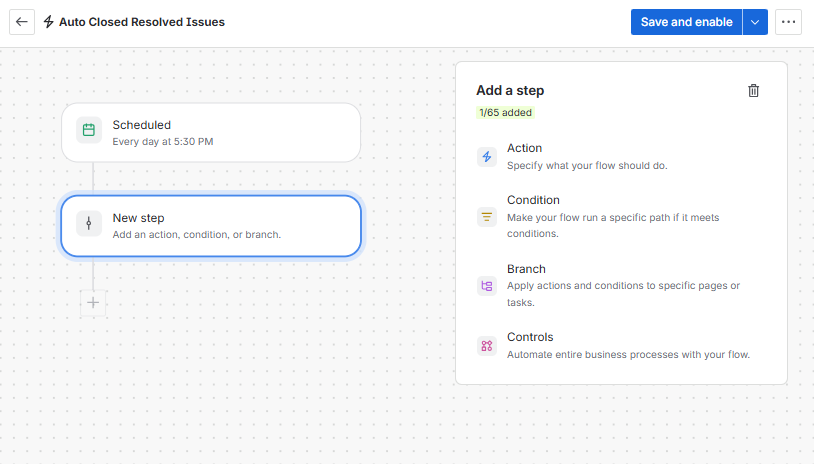
Step 2: Create a Jira Automation & Set General Flow Details
Navigate to Jira Automation and start a new rule.
Before configuring the automation logic, you must define the administrative settings in the Flow Details section.
Step 3: Define the Trigger
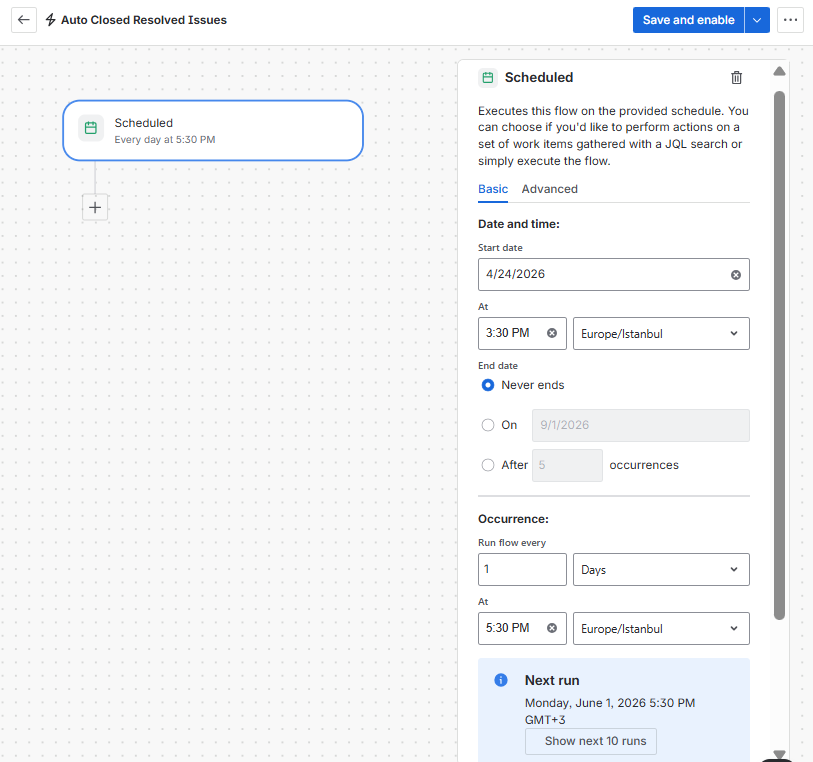
Use the "Scheduled" trigger to run the automation on a recurring basis. This step ensures the automation runs every morning and scans all relevant issues automatically.
-
Start date: Set your desired start date.
-
Time: Set the time as you prefer.
-
End date: Set your desired end date.
-
Occurrence: Run flow every 1 Day(s) at 8:00 AM
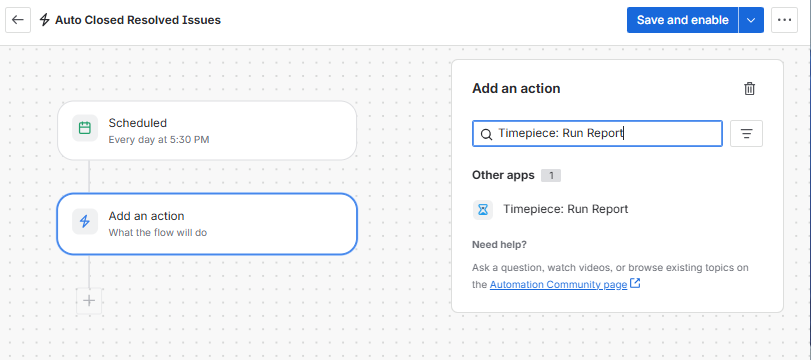
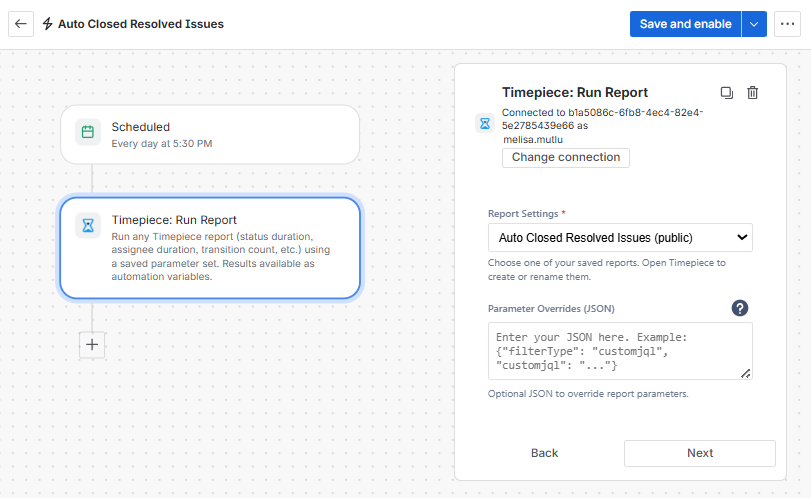
Step 4: Add Action - Timepiece: Run Report
After defining the trigger and conditions, add a “Timepiece: Run Report” action that will fetch the required data from Timepiece.
Select the report (Parameter Set) you created for this automation in the Report Settings field.
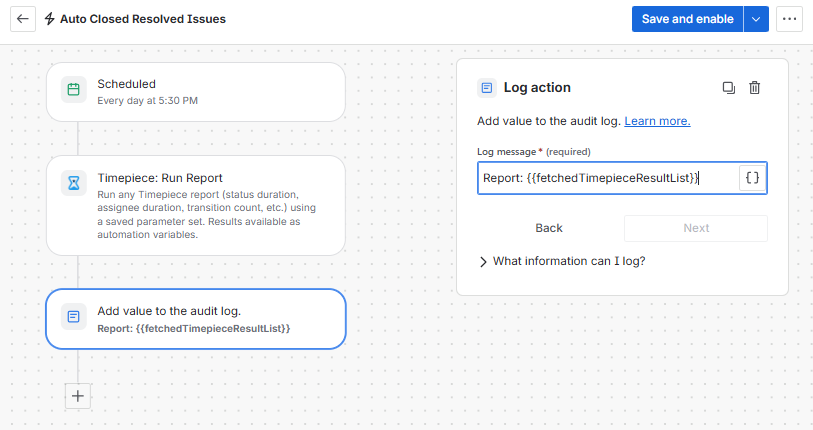
Step 5: Add Log Action (Optional)
Add a Log Action to your flow. This step is necessary if you want to monitor the automation and is helpful for debugging in the event of an error.
This action writes the entire dataset returned from the report as a log output, allowing you to see all available data at once.
Log Message: resultList: {{fetchedTimepieceResultList}}
Note: For more details about the logging and debugging, see the documentation.
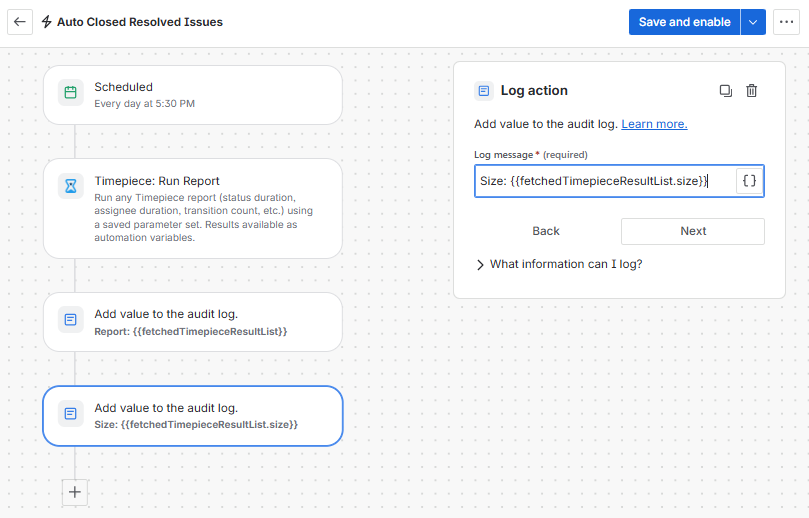
Step 6: Add Size Log Action (Optional)
Add a second Log Action to your flow. This step is useful to monitor the total count of items returned by the report, allowing you to see the dataset's volume at a glance in the audit log before the comparison condition runs.
Log Message: Size: {{fetchedTimepieceResultList.size}}
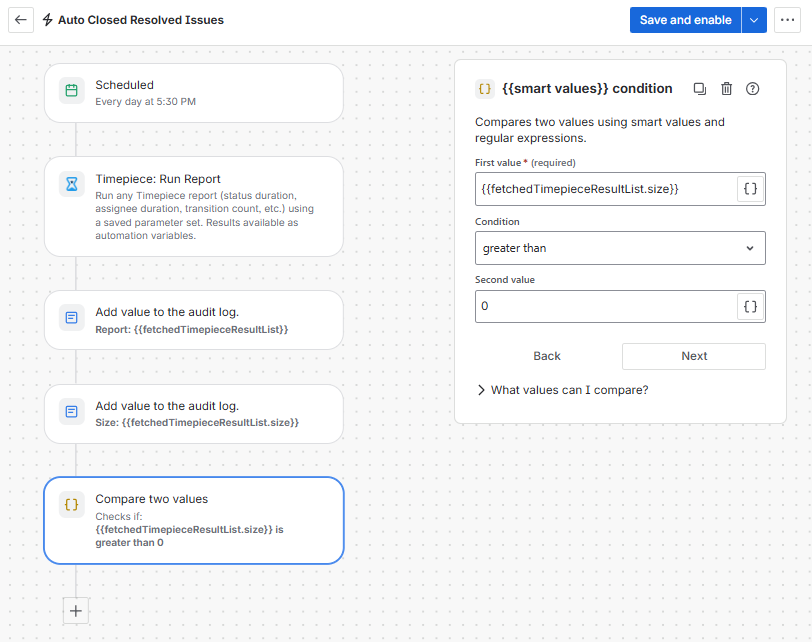
Step 7: Check if the report contains any issues
Add a condition to verify if the report contains any data before executing subsequent steps; if no data is found, the automation ends there.
First Value: {{fetchedTimepieceResultList.size}}
Condition: Greater Than
Second Value: 0
Step 8: Add Action - Branch / For: JQL Loop
Add a Branch block and define a “For: JQL” loop within it to iterate over each issue returned from the Timepiece report.
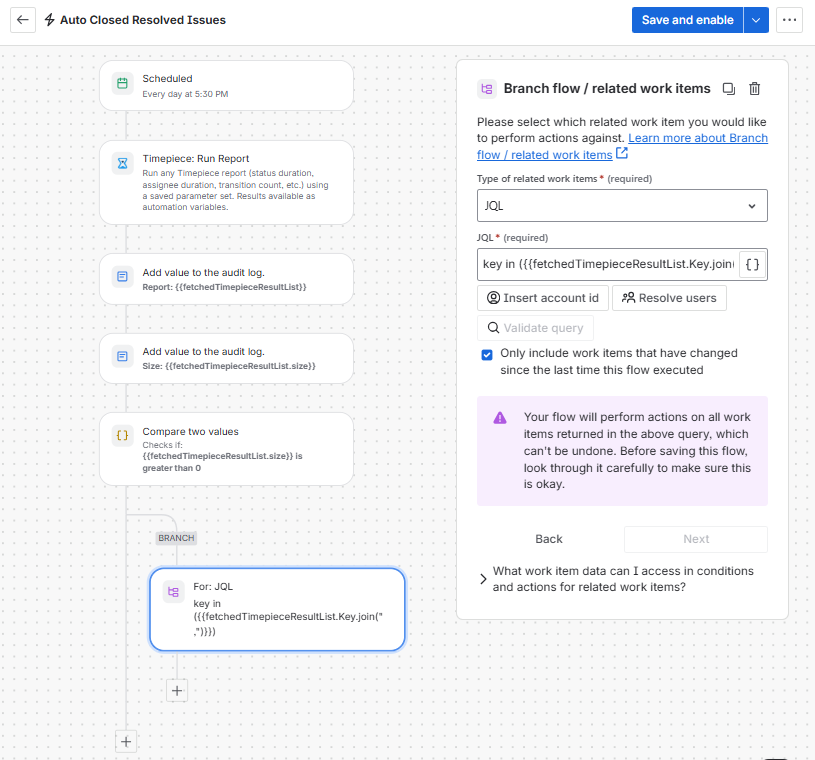
key in ({{fetchedTimepieceResultList.Key.join(",")}})
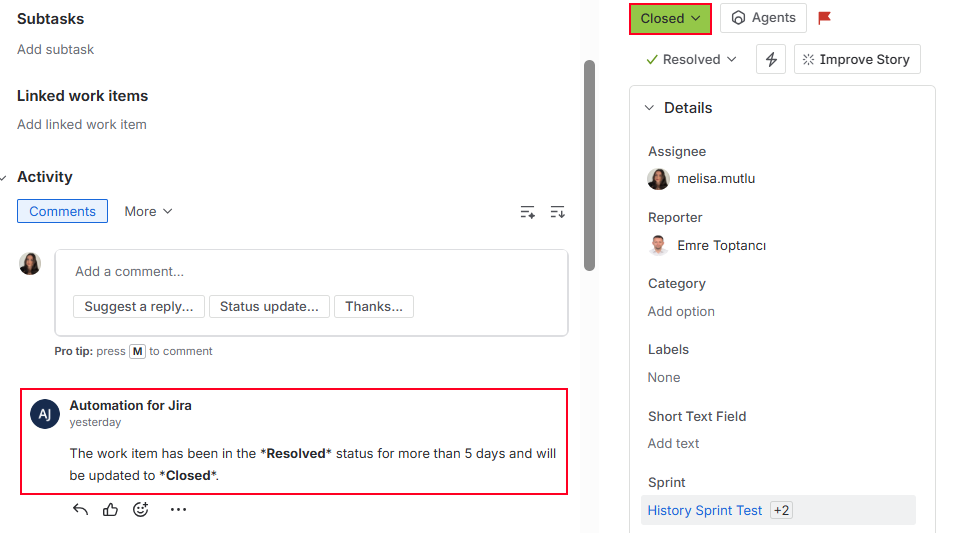
Step 9: Add Action - Add Comment to Work Item
Using the “Comment on work item” action, the automation flow adds a comment directly to the issue. By using this action, the information about the issue being in Resolved status for more than 5 days is added to the work item.
Add a comment for this automation:
The work item has been in the **Resolved** status for more than 5 days and will be updated to **Closed**.
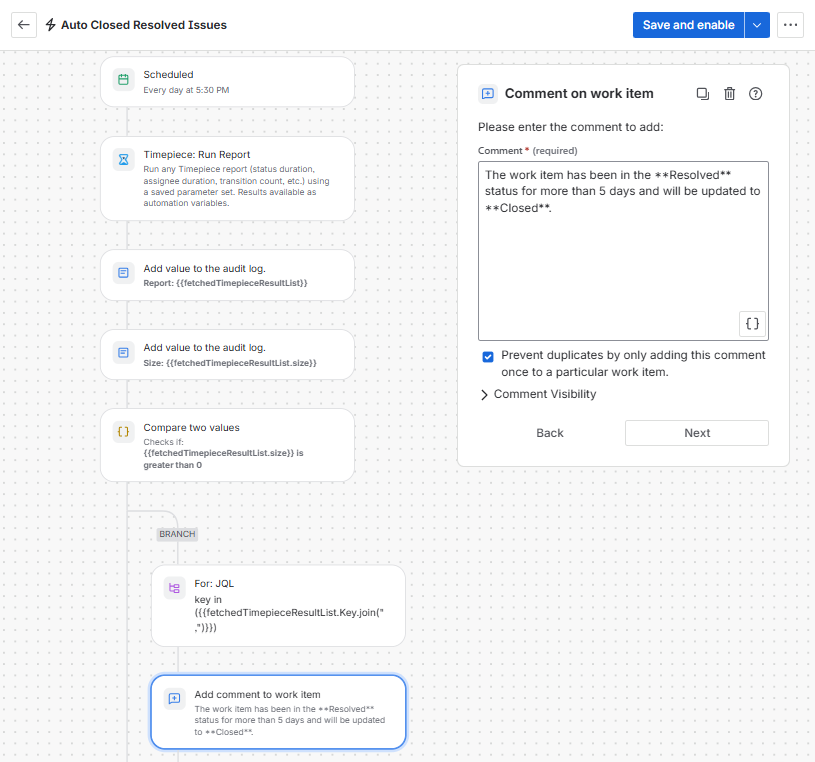
Make sure these statuses exist in your project, or replace them with the statuses available in your project.
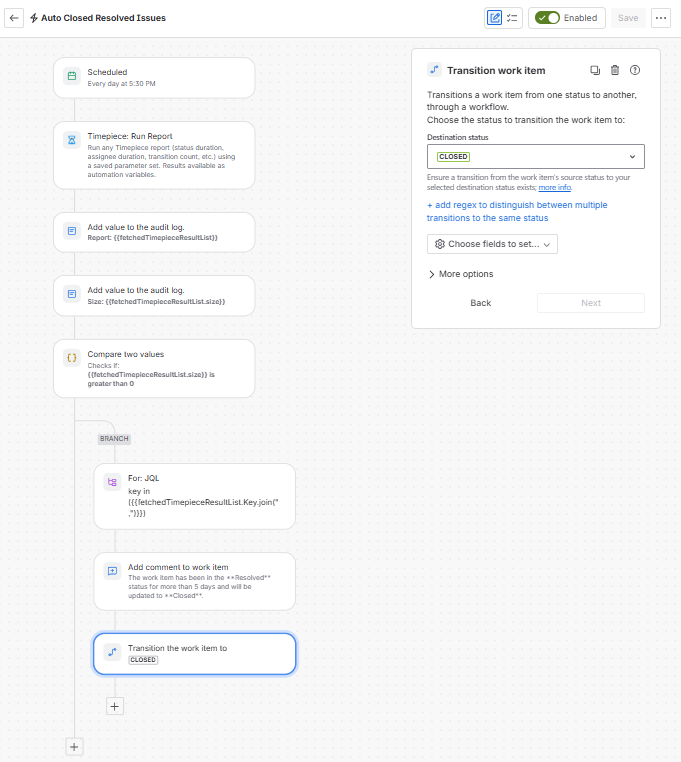
Step 10: Transition the Work Item to Closed
Add a "Transition work item" action inside the loop. In this step, the automation transitions the work item from Resolved to Closed status.
-
Destination status:
CLOSED
Step 11: Enable the Rule
Click the "Turn on rule" button to activate the automation. From this point forward, every morning at 08:00, the automation will automatically find issues that have remained in Resolved status for over 5 days, add a comment, and transition them to Closed.