Business Need
You need an automated process that periodically checks all unresolved issues in a project, calculates their cycle time using Timepiece, and posts a comment on any issue that has exceeded a defined SLA limit.
Solution
“DURATION BETWEEN STATUSES” report type of Timepiece, combined with Jira Automation, can be used for this purpose.
Step 1: Configure and Save the Timepiece Report
First, create a Timepiece report...
-
Open the Timepiece reporting page.
-
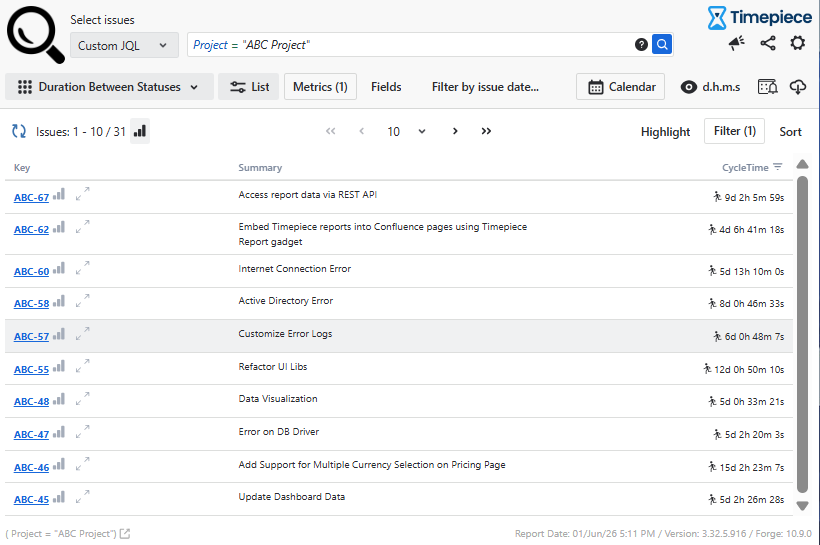
Select the project in which the support issues reside (Let’s presume you have selected the ABC project).
-
Any filter selection at this point works. The selection made at this stage is not critical, as it will be overridden later during the automation configuration.
-
-
Switch to the “DURATION BETWEEN STATUSES” report type.
-
(Optional) Select your business calendar if you have one.
-
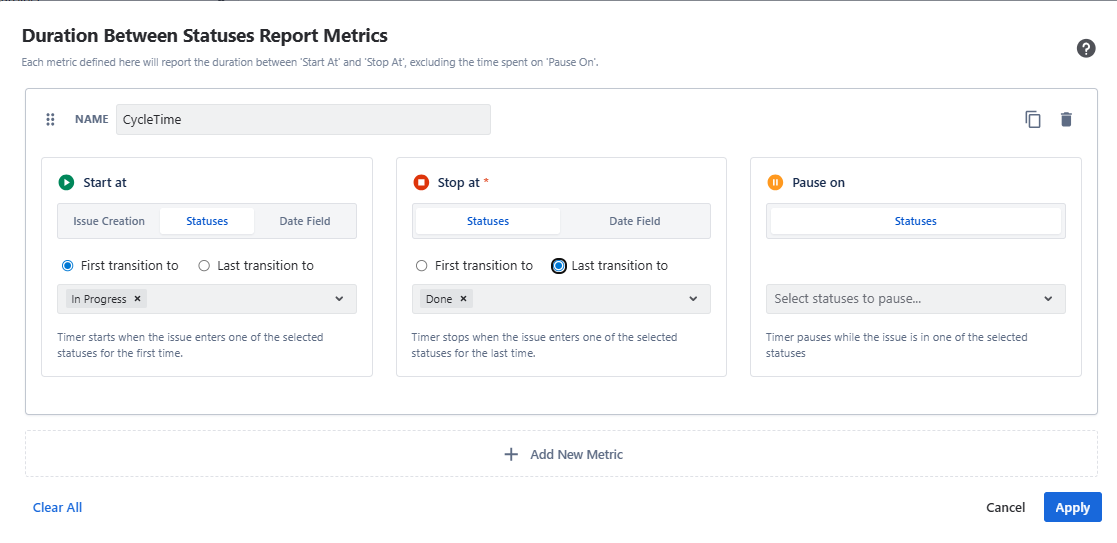
Create a metric where the start and end points reflect your SLA metric.
-
This example uses a metric where the start is "First transition to In Progress", and the end is "Last transition to Resolved".
-
-
Use an appropriate name for your metric
-
This example names the metric as "CycleTime".
-
-
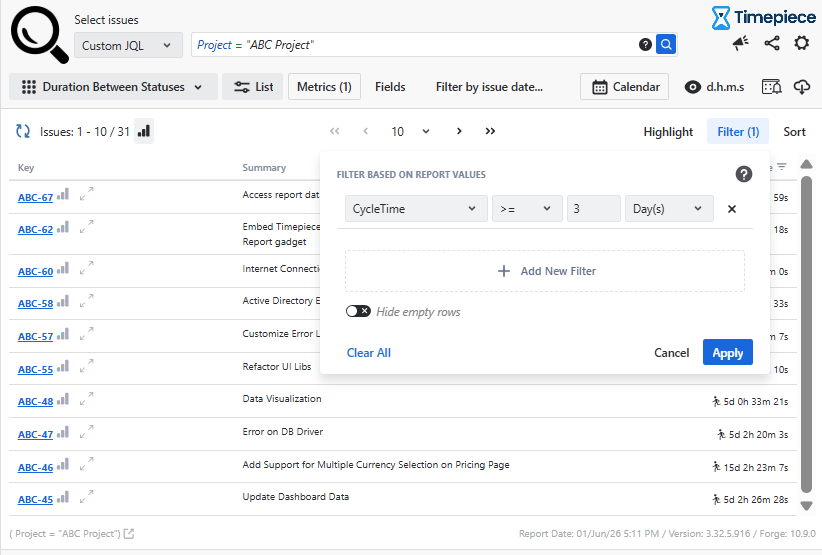
Filters issues that have a Cycle Time greater than 3 days.
-
Go to settings and save it via "Save report parameters".
-
The parameter set name should be like "ABC Project Cycle Time Automation".
-
Make sure you select the "Share with everyone" option so others can use the param set as well.
-
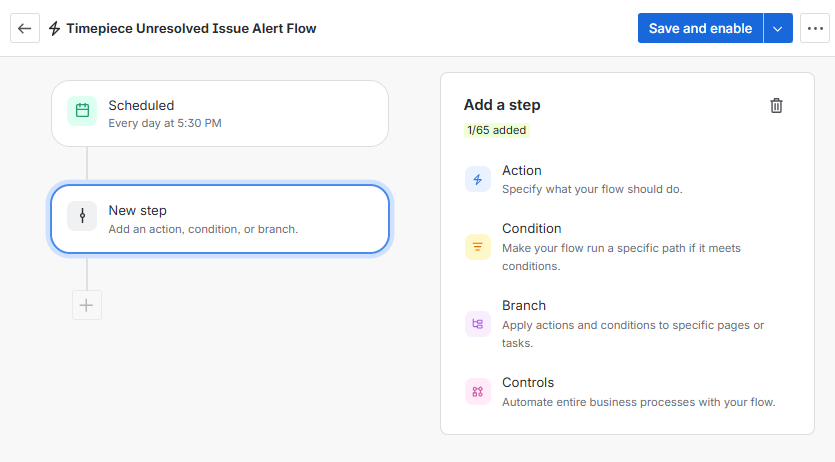
Step 2: Create a Jira Automation & Set General Flow Details
Navigate to Jira Automation and start a new rule.
Before configuring the automation logic, you must define the administrative settings in the Flow Details section.
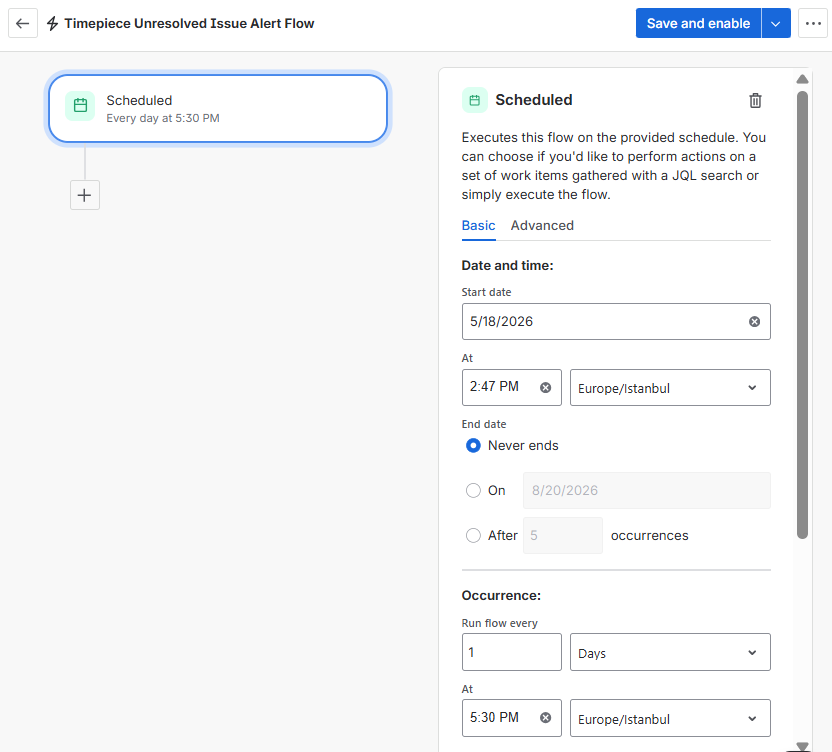
Step 3: Define the Trigger
Use the "Scheduled" trigger to run the automation on a recurring basis. This step ensures the automation runs daily and scans all relevant issues automatically.
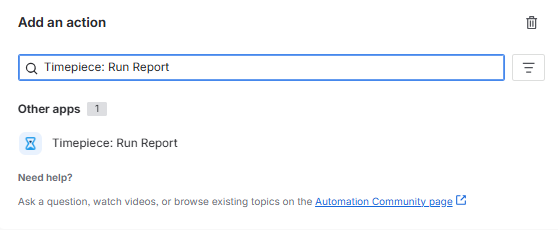
Step 4: Add Action - Timepiece: Run Report
After defining the trigger and conditions, add a “Timepiece: Run Report” action that will fetch the required data from Timepiece.
-
Select the report (Parameter Set) you created for this automation in the Report Settings field. Ensure that the report has been previously saved using the “Save Report Parameters” option.
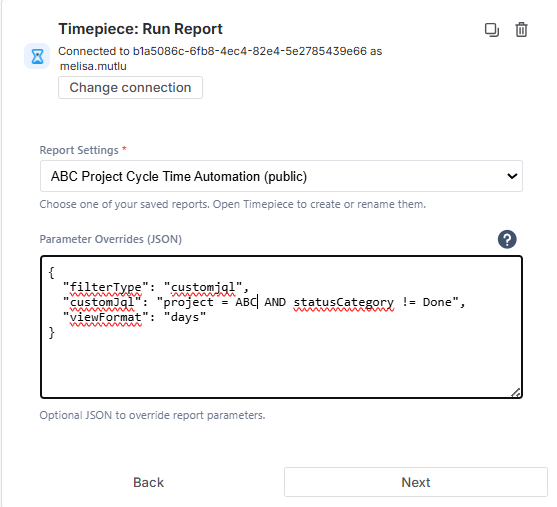
Parameter Overrides
Override some report parameters with a custom JSON. We’ll override the report filter so it returns data only for issues in the relevant project that are not in “Done” status. It ensures the automation fetches only active issues instead of a general dataset.
Parameter Overrides: {"filterType": "customjql","customJql": "project = ABC AND statusCategory != Done AND key = {{issue.key}}","viewFormat": "days"}
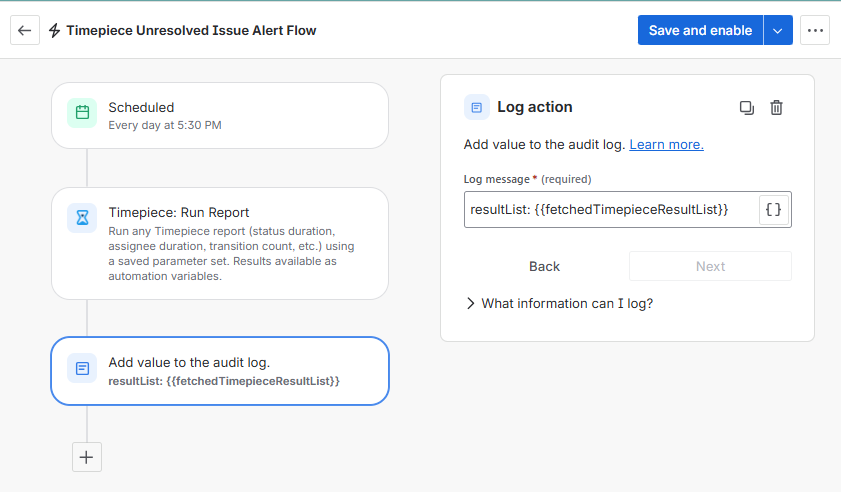
Step 5: Add Log Action (Optional)
Add a Log Action to your flow. This step is necessary if you want to monitor the automation and is helpful for debugging in the event of an error.
Log Message: resultList: {{fetchedTimepieceResultList}}
Note: For more details about the logging and debugging, see the documentation.
Step 6: Create Lookup Table
This step creates a dynamic lookup table named CycleTimeTable by mapping each issue key to its corresponding cycle time value from the fetched report data, making it easy to retrieve and use these values in subsequent automation actions.
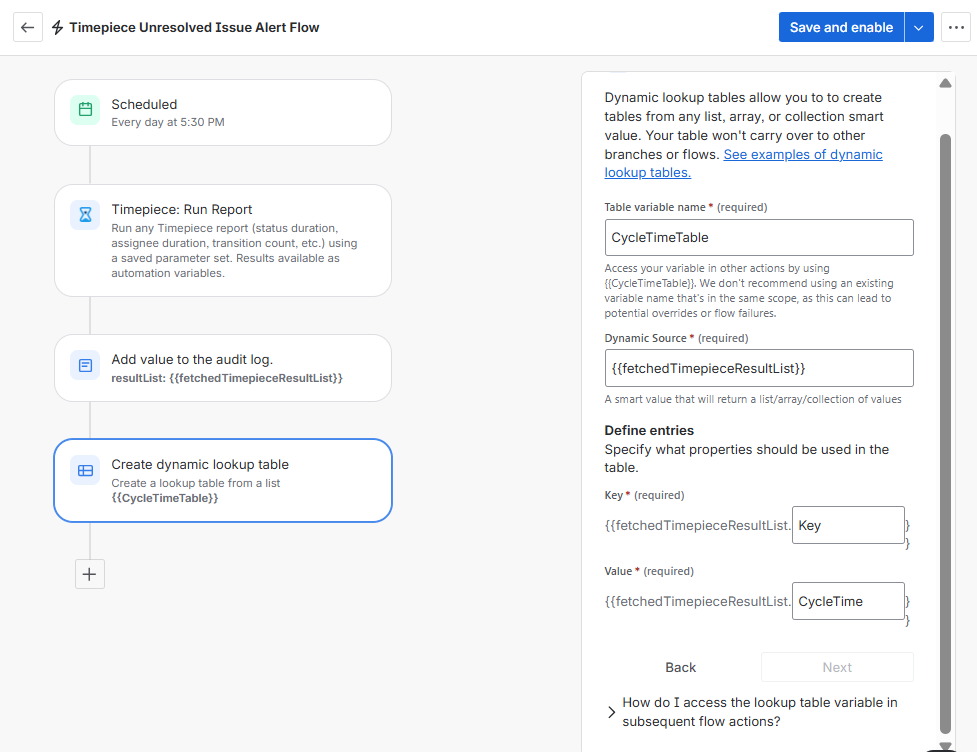
Table variable name: CycleTimeTable
Dynamic Source: {{fetchedTimepieceResultList}}
Step 7: Add Action - Branch / For: JQL Loop
Add a Branch block and define a “For: JQL” loop within it to iterate over each issue returned from the Timepiece report.
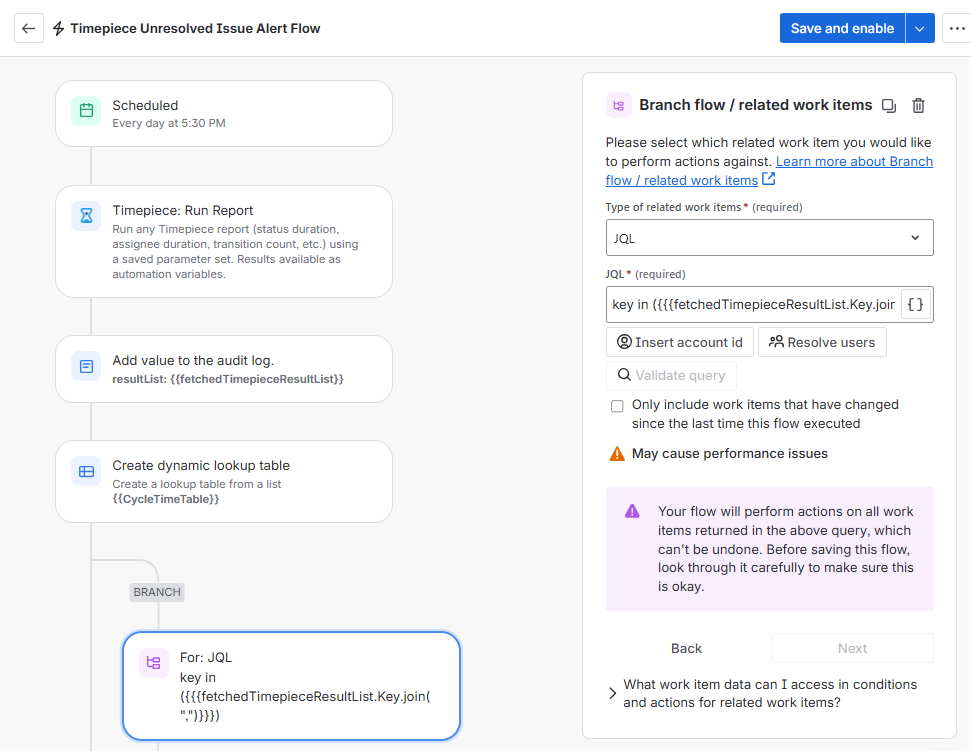
key in ({{fetchedTimepieceResultList.Key.join(",")}})
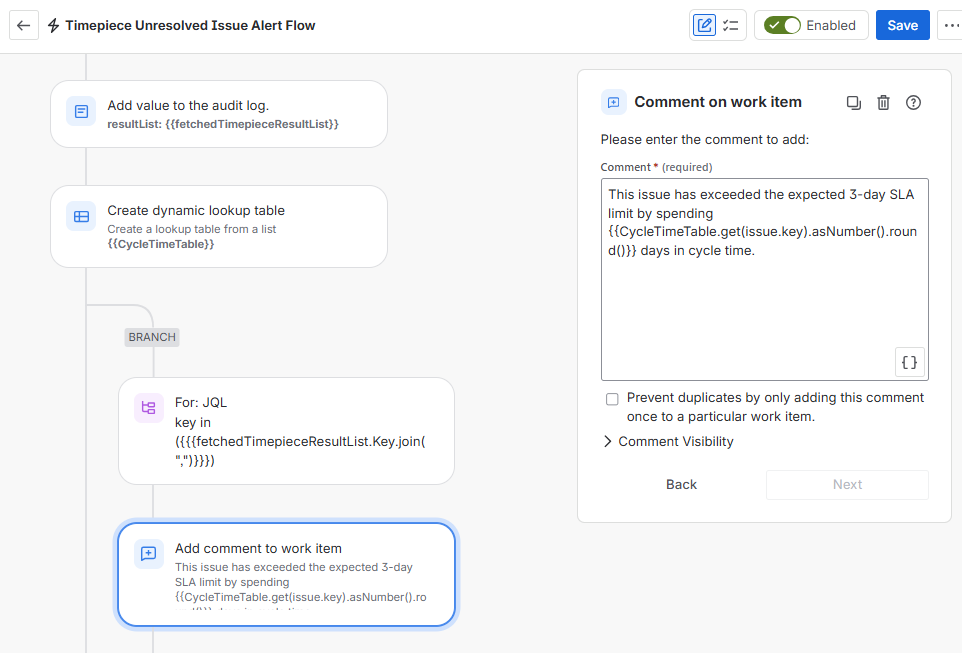
Step 8: Add Comment To Work Item
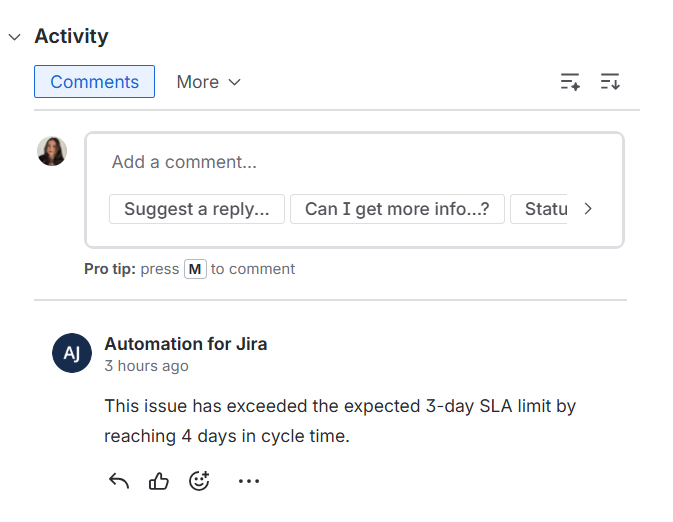
In the Comment on work item step, the automation adds a comment directly to the issue. By using this step, the information about the issue exceeding the SLA limit is added directly to the work item.
Add a comment for this automation:
This issue has exceeded the expected 3-day SLA limit by spending {{CycleTimeTable.get(issue.key).asNumber().round()}} days in cycle time.
Step 9: Enable the Rule
Click the "Turn on rule" button to activate the automation. From this point forward, every day at 17:30 (Europe/Istanbul), the automation will automatically find issues that have exceeded the 3-day SLA limit and add a comment to them.